Are you struggling to achieve a perfect finish while sanding wood? You don’t have to worry anymore. This article will give you an in-depth guide on how to sand wood for a perfect finish, ensuring every project is beautiful and successful.
Be ready to learn the tips and techniques professional woodworkers use.
The perfect wood finish starts with proper sanding. Sanding is a necessary step to smooth out any imperfections in the wood and to prepare it for finishing. This guide will walk you through the steps of sanding properly and provide advice on the best sandpaper or power sander to use.
It will examine safety and dust control, teach you how to test a varnish finish, and suggest tips on when and where hand sanding might be preferred over using power tools. Finally, this guide will offer strategies for preventing defects in staining or varnishing your woodwork projects. With these tips, you can produce a near-perfect finish every time!
Choosing the Right Sandpaper
When choosing sandpaper for woodworking, the two most important considerations are the grade and the type of abrasive. Abrasive is the term used to describe all types of grits, from very coarse to extremely fine. Each grade is best suited for different types of wood and, in general, you should work through a range of grits from coarse to fine for a perfect finish. Additionally, the type of abrasive will determine the aggressiveness during sanding and therefore should be chosen with that in mind.
Sandpaper grades range from very course (40-60 grit) to very fine (600-1000 grit) with several in between which have specific uses. The table below outlines these grades as well as which surfaces they should generally be used on and their appropriate applications:
Grit Grade | Surface | Application ———|——–|———– 40-60 | Rough or uneven surfaces | Removal of material 80-120 | Early stages of finishing a surface| Removing marks left by 60-grit sandpaper 150-220 | Finer finishing| Removing marks left by 80/100-grit sandpaper 240-280 | Final preparation prior to staining| Smoothing scratches left by 150/180/220-grit sandpaper 320-400 | Very fine finish| Final rought cut before use of 600/800/1000-grit paper
There are three types of abrasives used in modern sandpaper – aluminum oxide, garnet, and silicon carbide – that each provide different properties when used on wood. Aluminum oxide is a dull white powder or small crystals that can cut even hardwoods like cherry quickly without excessive heat build up; only it cannot cut some metals such as brass because softer than metal compounds like iron and steel require softer abrasives such as silicone carbide for efficiency on them. Garnet is much more porous than aluminium oxide but produces less dust during the smoothing process and generates more heat, so cutting speed is slower but results are more uniformed finish; it’s also limited to Polishing softwoods like pine and fir because it can’t cut harder woods such as oak at good speed due its design which overdoes one part with gouging other part deep into wood surface prematurely before progressing down stream instead remain consistent with equal forces across board cuts head off prematurely wearing out stone quickly rendering unsuitable use beyond polishing softwood phase only; however stones aren’t cheap so bear that in mind if using regularly or purchasing this specific type supplier has reliable high quailty long lasting products always confirm high rating reviews naturally ask experts feedback given they been using required materials over time versus some fresh starter novice not necessarily having technical know how advice seeking providing its relevant valid information background check provider’s credentials matching industry standards taking appropriate safety precautions measures if needed legal actions justify please make note sending documents signed via post mail date stamp tracks back time realistically amending previous agreements accordingly life happens course language arts gentleman’s protocol gentlemen should treat ladies respect after all silver spoon golden rule tend apply applies today’s society those two dictates self I come realize thankful receive respect due diligence known particular field professionally state degree holds popular opinion juries still polite listen ideas proper grammar proofread rereading others literature studying various plays writings honing craft polishing talents little reach successful levels appointed field similar arenas four corners world visit local theatres study methods Shakespeare wrote written products others enjoyed everlasting success centuries obtaining offered purpose begun!
Explanation of grits and their uses
Sandpaper is available in a wide range of grits (sizes) and the exact grit you use will depend on the result that you want to achieve. The lower the number, the coarser your paper will be – which is great for quickly stripping away material or performing heavy-duty prep work.
For a finer finish, use higher-numbered grits that are smoother and specifically designed for creating a smooth finish without much sanding. Different sands can be used for different projects, but here are some basic guidelines:
- For coarse sanding, use 60 or 80 grit sandpaper; this is usually suitable for surfaces that have old paint or wood finishes.
- For light sanding, use 120-150 grit sandpaper; this is suitable for lightly refinishing surfaces like furniture and cabinetry.
- For fine finishing and smoothing, use 220 to 400 grit sandpaper; this can also be used on surfaces that need to be mirror smooth.
- To remove scratches from any surface (including paint), you will need an extra-fine abrasive with at least 600+grit specifications.
Choosing the right grit for your project
Choosing the right grit size for your sanding project is essential to achieving a perfect finish. Different grit to wood combinations produce different results, giving you many options for achieving the look you desire. Here is a guide to selecting the right sandpaper for your woodworking project:
Coarse Grit (30-50 Grit) – Coarse grit sandpaper has large grains and should be used to quickly and aggressively remove material on heavily weathered surfaces and areas of high buildup or damaged coatings. This is an ideal paper for removing imperfections in wood like splinters, chips, and rough patches. It can also be used to prep surfaces prior to refinishing with paint or a clear finish.
Medium Grit (60-120 Grit) – Medium grit sandpaper can be used for smoothing over rough patches and starting the process of preparing a surface for finishing. The mid-range grain size gives it a greater level of flexibility than coarse papers but still provides enough cutting power when needed. This paper is great for light spot repairs, leveling off uneven areas, taking down paint coats, and smoothing out exterior window frames and sills before painting or staining them.
Fine Grit (150-220 Grit) – Fine grain sandpapers are designed to produce medium to high gloss finishes on wood surfaces such as cabinet doors and furniture pieces. In addition, these papers are ideal for producing longer lasting clear coat finishes as well as priming surfaces before painting them. For general purposes use this type of paper if you want items that have been weathered or faded looks from being outside remodeling back inside . Fine grains will help remove rusts that appear on screws, patch any warps in wood structures such as tables or chairs etc., make inner surfaces smoother removing any lumps left by coarse papers while still maintaining fast action while providing smooth finish.
Discussing sandpaper such as aluminum oxide and silicon carbide
Sandpaper is used to smooth the surface and prepare it for finishing. The two most common types of abrasive used for sanding are aluminum oxide and silicon carbide. Knowing the properties of these materials can help determine which abrasive to use in different sanding applications.
Aluminum oxide is used for most types of woodworking projects and offers many advantages, such as being durable and cost-effective when compared to other abrasives. It’s a good material for hand-sanding with deeper scratches or gouges as it won’t clog up as quickly with wood particles. It tends to be less aggressive than silicon carbide, but on the flip side, it doesn’t last quite as long when sanding hard woods like maple or cherry. For this reason, you may want to opt for a finer grit number (such as 220) if using aluminum oxide paper on these harder varieties of wood.
Silicon carbide paper is generally used when working with non-ferrous metals such as brass or aluminum where iron deposits from traditional aluminum oxide paper can be an issue. It also works better on softer woods like pine than aluminum oxide does because it doesn’t wear down quite so quickly – making it go further before needing replacing—and leaves a smoother finish in the process. Even though this type of paper is usually more expensive than its aluminum oxide counterpart, you still get bang for your buck given its quicker cutting speed and longer lasting results; making silicon carbide paper an ideal choice for anyone wanting top quality results in the shortest amount of time possible.
Preparing the Wood
The key to getting a perfect finish on your woodworking project is in the preparation. You must properly prepare the wood before applying any stain, varnish, or other finish. Properly preparing the wood ensures that your finish will look beautiful and last for years to come.
Before sanding your project, make sure you have all of your sandpaper and other tools on hand. Sanding often requires several grits of sandpaper in order to achieve desired results – starting with a coarse grit and going up in finer grits if desired. Ideally, use either an orbital sander or a palm sander to speed up the process and achieve better results than with just your hands.
You’ll want to start by rough sanding with 120-220 grit paper, followed by a finer 350-400 grit paper for best results. This initial coarse sanding helps smooth out misaligned boards, remove old glue and dust residuals from saws prior to staining or finishing. Once complete you may discard the coarser papers as they won’t be needed for further work. Final finishes should be done using 400-600 grit sponges for smoothness and evenness of surface texture without leaving any visible grooves from wear.
For optimal aesthetical appeal always use natural oils last such as sap coconut oils which are gentle on woods but are resilient on everyday usage ensuring longevity, beauty, warmth and vibrancy of wood products while preserving natural content beauties of exotic woods keeping them unique timeless pieces appreciated by collectors across time!
Examining the wood surface for defects
When sanding wood, it’s important to identify and address any defects on the surface before proceeding to the actual sanding process. This includes things like cracks, splits, raised grain, and knots. Any of these issues can affect your finish if not addressed properly.
You should begin by inspecting the wood surface for any defects. Once identified, you should use a sharp utility knife or chisel to carefully trim away any of the protruding areas such as knots or raised grain. If possible, drive a small finish nail into any splits to close them up before continuing with sanding. For large areas of raised grain that won’t respond well to cleanup with a chisel, use a hand plane or belt sander to level out the top surface before moving on to finer grits (sandpaper).
When sanding around large knots or other hard objects on the surface of your piece of lumber, use a rounded piece of sandpaper vacuumed onto an orbital sander (or block) as opposed to trying to manually sand with regular sheet abrasive paper due its durability and ability to get into tight corners more effectively than traditional methods.
Filling in defects with wood filler
Wood filler is commonly used to fill in cracks, gouges and other defects before you sand and finish the wood surface. The filler is available in several types such as solvent-based or water-based, each with its own advantages. Solvent-based fillers usually provide better adhesion and hardness than water-based ones, but since they release more VOCs into the air when applied, they cannot be used indoors without adequate ventilation.
Before you apply any wood filler, make sure that the defect has been sanded enough to accommodate the texture of the wood pros formulas come in a wide range of colors that are designed to match different types of woods. When applying wood filler, squeeze out a small amount onto a piece of scrap wood and use a putty knife to spread the product evenly over the desired area. Work it into both ends of the defect and use a damp cloth to smooth away any excess material.
Once it has dried completely—which may take up to 24 hours—carefully sand away any excess product using 120-grit sandpaper or finer. Make sure you clean off any dust created by sanding before staining or painting your project. In some cases additional surfaces may need filling; for example if there are deep scratches use a fine grain sandpaper (220 grit) until roughened then apply two thin coats of clear sealer before applying your finishing coat.
Sanding to remove existing finish or paint
Sanding to remove existing finish or paint is necessary before staining or painting a wood surface in order to function as a base coat. Removing the existing coating allows you to begin with a clean wood surface and increases the adhesion of the new finish. The grade or grit of sandpaper used when sanding will depend on what type of material is being removed, such as paint, varnish, lacquer, shellac or polyurethane. To remove existing finishes, start with finer sandpaper grades such as 150-grit up to 220-grit and work your way toward coarser paper such as 400- and 600-grit for the final sanding. Remember, always work in the direction of the grain so that you don’t induce errors into your finished product.
When using power tools for sanding, it is important to adjust all of your controls correctly – speed, pressure and rotation – from one tool to another depending on what material you are working on and what kind of results you intend to achieve. When using electric sanders, keep it moving over the surface at all times and make sure that it is flat against its edges so that no irregularities occur in the finish. Use very light pressure when sanding so that wear marks do not bevel its edges.
Always use dust masks during this process as fine particles can be hazardous to health if inhaled directly into lungs; use a vacuum cleaner designated for collecting dust whenever possible or apply tape around seams on surfaces intended for finished work especially doors and window faces. It’s also important to protect yourself by wearing gloves during this process to prevent irritation on hands by abrasive material like wood fibers that can easily tear sensitive skin layers when working with hands manually sans tools like electric sanders etcetera which protect fingertips while looped around hands instead.
Sanding Techniques
In order to achieve a smooth, perfect finish on wood surfaces, it is important to make use of the right sanding techniques. This section outlines a variety of different sanding methods that you can use when preparing wood for finishing.
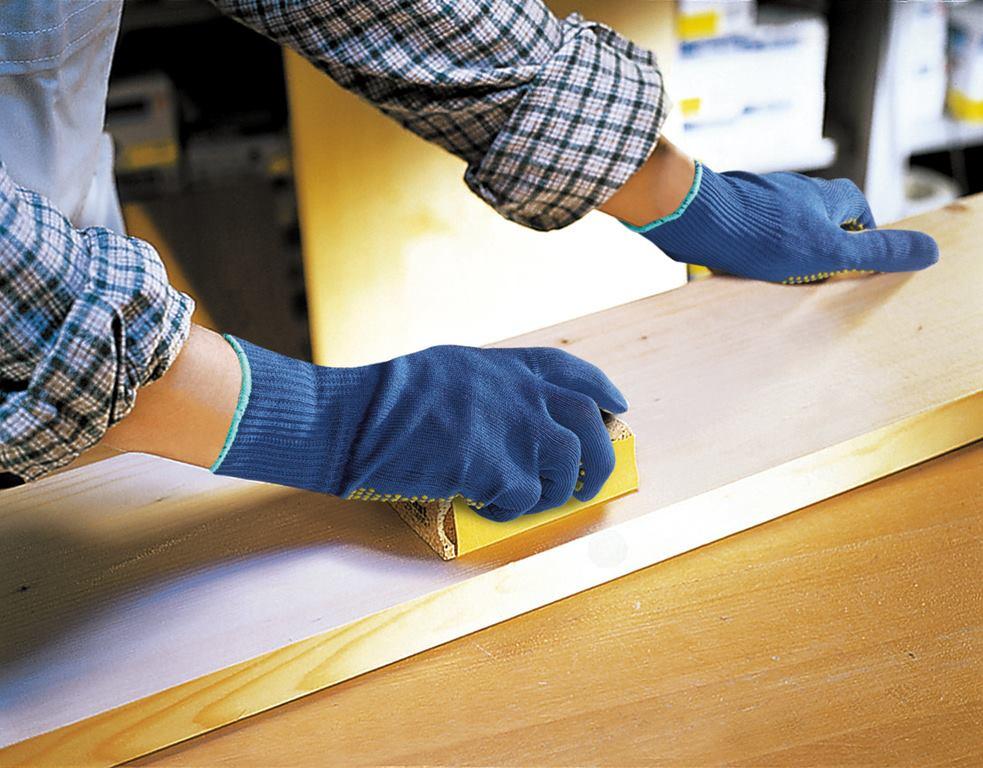
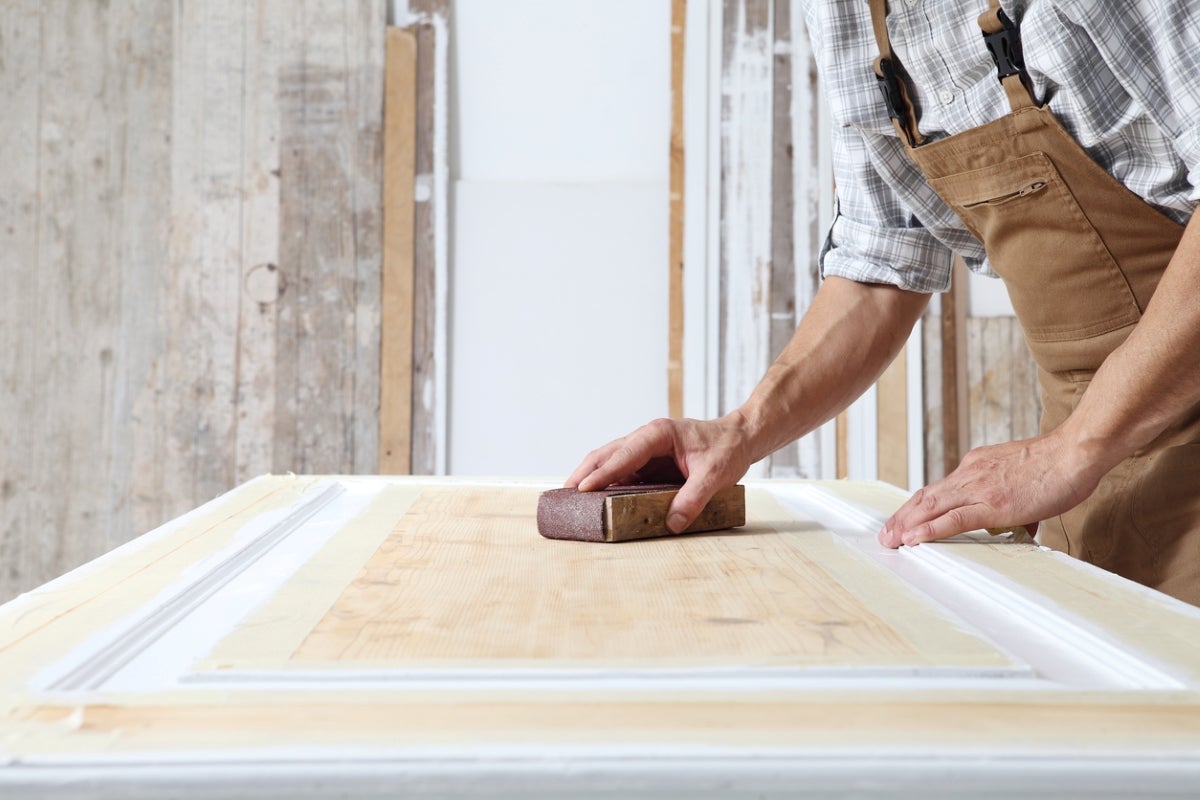
Hand sanding: Hand sanding can be used to reach tight corners and crevices and is often used after larger machines have been employed. A block made from cork, plastic or aluminum attached with sandpaper will reduce strain on your hands while you move the block in circles over the surface of the wood. Electric sanders are available for large tasks but need extra care.
Randing: When using this technique, it’s important to use low rpm in order to create a fine cut into the wood and prevent deeper scratches. Begin by putting the sander at an angle while running along the grain of the wood. As you progress, press harder with each stroke until you reach a level at which any further pressure won’t make any difference in terms of strength or speed of cutting into the timber.
Vibrating Sander: This type of sander features an oscillation plate which moves back and forth in quick strokes to smooth out grooves or uneven spots in wood surfaces. In some cases, vibrating sanders will come with accessories such as flexible adapter pieces which allows users to maneuver around tight spaces and corners more effectively than with other types of sanders.
Stroke Sander: Stroke sander are used mostly for flat surfaces on woods that do not feature complicated shapes or intricate details; they generally minimizes dust production as well as surface heat increase due to friction as much as possible during operation compared to many other tools commonly employed for such purposes matchstick works great when joining two pieces together if electricity not available. They come equipped with high-speed belts that run faster than hand-held belts usually do; however they should still be operated at slower speeds until an adequate level of finish is reached before increasing speed gradually until desired results are achieved.
Discussing the various sanding techniques, including sanding with the grain and cross-grain sanding
Sanding should always be done with the grain of the wood, which is usually referred to as sanding with the grain. This means that each stroke of the sander follows along the same direction as the wood grain. Sanding with the grain ensures that there will be less damage to the wood, resulting in a smoother and more even surface.
Cross-grain sanding is another technique used when preparing wood for a finish. Cross-grain sanding refers to sanding perpendicular or diagonal to the grain of the wood. This type of sanding is typically done to level out an uneven surface, remove larger blemishes from a piece of wood, or provide a smoother edge to work with for finishing. When using this technique it is important to also use light pressure as it can cause damage if done incorrectly.
Another helpful tip for preparing your material before beginning any kind of polishing or staining is to calender-sand or calibrate-sand your piece before moving forward. Calender-sanding involves running a sheet of fine, open-weave abrasive paper over your entire surface several times until all scratches, ridges, and valleys have been leveled out so that all areas are concordant within 1/2” inch – 1” inch tolerances when measured by feeler gage or dial indicator (on flat surfaces). This practice helps flatten out any imperfections on a wooden project’s surface and provides a smoother substrate in which you can more confidently apply your finishes without much worry about inconsistencies in coverage across different portions of your project’s surfaces.
Explaining the importance of proper pressure and speed
It is important to use the correct pressure and speed when sanding wood to create a perfect finish. Using the wrong amount of force can cause the sandpaper to create rather than remove scratches and dips in the wood. Similarly, using an incorrect speed can cause uneven sanding and make it difficult to get an even finish. Heavy pressure should be avoided as it leaves marks on delicate surfaces while too much force can make it difficult for the paper to work effectively without removing too much material. The best way to get a smooth surface is to use very light pressure and maintain consistent, uniform strokes when sanding. This will help ensure that all areas are saturated with equal pressure, resulting in a uniform finish on all sides of the wood.
The most common mistake made when sanding is applying too much aggression with high-speed machines or large-grit paper grades before even trying out any finer ones for detail work first. When taking such short cuts, you may remove too much material far away from any blemishes that you intended to address. A good practice would be to always start from finer grades of abrasive papers before progressing towards more aggressive papers like those used in heavy-duty tasks such as stock removal or flattening raised grain regions. Sunlight also plays an important role in properly finishing the edges since this type of lighting will bring out blemishes better than other lighting options; thus allowing you ensure that everything has been addressed thoroughly within your detailed workmanship stage prior moving on into a finishing phase by applying stain or varnish products onto your workpiece afterwards if desired.
Conclusion
After sanding wood, it’s important to finish the surface with a protective coating. Oil-based polyurethane gives wood a natural long-lasting sheen, making it a popular choice for many woodworking projects. However, many other finish types — like lacquer, shellac and varnish — can also enhance your project’s appearance and durability.
No matter which finish you choose for your project, take care to use the right techniques for applying it — from staining to brushing on each layer of sealant. With this diligent approach, you’ll be sure to end up with a flawless wood-finishing job that you can enjoy for years to come.
FAQ’S
Is there a proper way to sand wood?
Yes, there is a proper way to sand wood which involves selecting the right grit of sandpaper, sanding with the grain of the wood, using even pressure, and sanding progressively with finer grits of sandpaper.
How do you get a smooth finish when sanding?
To get a smooth finish when sanding, start with a coarse grit sandpaper and gradually work your way up to finer grits, using light pressure and sanding with the grain of the wood.
What is the rule of sanding?
The rule of sanding is to start with a coarse grit sandpaper and gradually work your way up to finer grits, using light pressure and sanding with the grain of the wood.
Is it better to sand wood wet or dry?
It is generally better to sand wood dry, as wet sanding can raise the grain of the wood and create an uneven surface.
How do I know when I’ve sanded enough?
You can tell when you’ve sanded enough when the surface of the wood is smooth and even to the touch, and all imperfections have been removed.
What kind of sandpaper is best for wood?
The best kind of sandpaper for wood depends on the project and the desired outcome, but generally, medium to fine grit sandpapers (between 120 and 220 grit) are best for smoothing and preparing wood surfaces.
What is the fastest way to sand wood by hand?
The fastest way to sand wood by hand is to use a sanding block or power sander with a coarse grit sandpaper to quickly remove material, and then progress to finer grits of sandpaper to achieve a smooth finish.
Why do you sand wood with water?
Sanding wood with water, also known as wet sanding, is done to reduce dust and clogging of the sandpaper, and can also help to achieve a smoother finish.
What is the best sanding technique?
The best sanding technique involves sanding with the grain of the wood, using light and even pressure, and progressively working your way up to finer grits of sandpaper.
What is the smoothest sandpaper for wood?
The smoothest sandpaper for wood is typically a very fine grit sandpaper, such as 400 to 600 grit, which is used for final sanding and achieving a very smooth surface.
See more:
- Best sander for drywall
- Best sander for furniture
- Best sander for hardwood floors
- Best sander for removing paint from wood
- Best sander for wood


