Do you want to refinish your furniture with minimal effort? A detail sander can make the job much easier!
Learn how to use one correctly and give your furniture a fresh look without breaking a sweat.
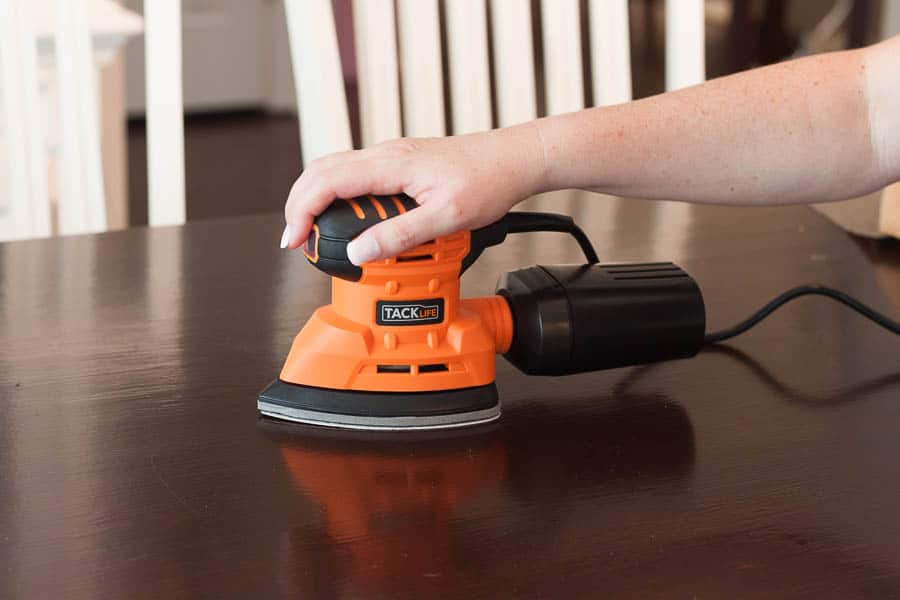
In this guide, we will discuss the process of refinishing furniture with a detail sander. A detail sander is an electric, hand-held tool used for projects like sanding small surfaces and curvatures that other types of sanders can’t reach. It’s ideal for furniture refinishing as it helps to give pieces a smooth, even finish.
Using a detail sander to refinish furniture is not as complicated as it may seem and if done correctly, can be viewed as a rewarding experience once you’ve achieved the desired results. This guide will provide helpful tips and tricks on how to get started and ensure your project comes out just right.
Tools and Materials
Before you can begin the process of sanding and refinishing a piece of furniture, you will need to have the right tools and materials. Here is a list of items that you should gather:
-Detail sander: This small power tool is used to get into tight corners and hard to reach places. It also has a range of abrasive options, allowing you to achieve a variety of finishes.
-Sandpaper: You will need different types of sandpaper depending on the type of material that needs to be refinished (e.g., wood, metal, etc). For example, if you need to refinish wood then an ideal choice is 220-grit sandpaper for general shaping and finishing. For metal items such as railings or hinges choose coarse 120-grit paper.
-Safety glasses: To protect your eyes from any dust or pieces which may get thrown up by the sander in use.
-Dust mask: To prevent breathing in any debris kicked up during the process.
-Tack rags/cloth rags: Used for dusting off surfaces prior and after sanding as well as when applying finish materials such as varnish or stain.
-Finishing products appropriate for the material being refinished (i.e., varnish, sealant, wax etc).
List of the tools and materials needed to use a detail sander to refinish furniture
When using a detail sander to refinish furniture, you will need to gather the right tools and materials. This includes the detail sander itself, as well as sanding pads for the tool, a face mask to protect yourself from airborne wood particles, safety glasses in case of debris flying at your eyes, and a vacuum cleaner off to the side to capture dust.
Additionally, you’ll need several grits of sandpaper (ranging from 40-220), wood stains or varnishes for coloring, and rags for polishing.
With these tools in hand and some patience and practice you can use a detail sander to achieve professional-looking results on a variety of furniture types.
Explanation of how each tool and material is used in the process
Refinishing furniture can be a timely process and require a variety of tools and materials. A detail sander is one of the most versatile tools for this task, allowing you to sand into hard-to-reach places like corners and crevices. Here’s a quick guide on how to use a detail sander to refinish furniture:
Materials: sandpaper either in sheet form or an assortment of grits, tack cloths, wood stain, sealer/varnish/finish/laquer, painter’s tape. Tools: detail sander (which is different from an orbital or palm sander), dust mask or respirator, safety goggles.
Step 1: Clean the surface with a tack cloth. This eliminates any dirt or dust that may interfere with the finial finish.
Step 2: Cover up any glass surfaces by taping off with painter’s tape along outside edges of glass with at least 1 ½ inches extra on all sides.
Step 3: Begin sanding with the correct grit paper for your project taking care not to press too hard as this can damage the wood fibers if not done correctly. The detail sander is especially helpful in tight areas where an orbital may not fit as well such as around curves and corners as well as getting into small recessed areas like drawer and cabinet pulls. Make sure that you are also sanding in the same direction of the grain to ensure that you get a smoother finish in less time than when going against it would yield results.
Step 4: Repeat steps two through four until desired smoothness is achieved but remember; take your time! Rushing will result in imperfections!
Step 5: Once surface has reached acceptable smoothness then it’s ready for finishing touches such staining (optional) and sealing/finish application according to instructions on product label or special instructions provided by suppliers of functional parts used such lockset handles etc…
Step 6 : Allow dry times between coats write down times listed on labels so that they are not forgotten between applications! Be sure ventilation is sufficient room should have air intakes near ceiling level window open during application if weather allows . Once sealant has been applied allow drying times specified before adding next coat remember last coat should be one offering highest gloss value suggested by supplier avoid bursts sunlight day natural light source like skylight window reflect harmful UV rays shorten sealant lifespan read labels purchase accordingly.. Do Not apply heating or cooling devices near sealed area during curing period Doing So could warp entire project scratch irreplaceable parts worse destroy finish completely Like Every Other Step Sanding Refinishing Involves Precision Great Patience Fully Read Labels Instructions Always Work Safely With Proper Protective Gear For Best Results Have Experience Follow All Processes With Perseverance Enjoy Your Finished Product Hope Our Guide Helped Show Basic Procedure How To Utilize Detail Sander Refinish Furniture Successfully Happy Crafting!
Preparation
Before you begin using your detail sander, there are a few preparations that should be made. It is important to understand the surface you plan on sanding and the tools and materials you will need to give your project the best finish possible.
When using a sander, it is always important to select grits of sandpaper specific to the material being sanded. For furniture, start with rough grit paper, such as 24-60 grit paper and work up from there in increments of 150 up to 400 or higher. Additionally, adhesive-backed sandpaper can be used with most electric detail sanders for faster sheet changing during your project.
Finally, choose an appropriate dust mask for debris protection and use it throughout the sanding process. Before attaching any new sheets of sandpaper or beginning any refinishing job on furniture, make sure your sander is properly powered on and ready for work.
Explanation of how to prepare the furniture for sanding
Before beginning the sanding process, it is important to go through a few simple steps to make sure that the job is done correctly and safely. Before you start, make sure that you have all the tools and materials necessary for the job.
Begin by cleaning the furniture thoroughly with a damp cloth. This will remove any dirt or other debris that could potentially create scratches in the furniture during sanding. Then inspect the furniture for any loose nails, screws or other metal parts and either reattach them or replace them if needed. Remove any dust or built up film on wood surfaces with a wood cleaner before proceeding with sanding.
Once you are satisfied that all pieces are properly cleaned and secured, cover any nearby objects with a drop cloth to protect from dust and debris as you sand. Make sure that pets and children are not near to ensure their safety throughout this process. Finally, wear protective equipment such as eye protection, gloves, a face mask and hearing protection to protect your health during sanding.
Tips for choosing the right sandpaper grit
When looking for the right sandpaper to achieve your desired finished look, it’s important to understand the differences between sandpaper grits. Sandpaper grit is a measure of the size of abrasive particles on the paper and is typically expressed as a number ranging from 1 to 80 or higher. The lower the number, the larger and coarser the grit; the higher, the finer.
Grits in lower numbers, such as 20-30, are best used for heavier sanding and removing paint or varnish. Heavier grits in higher numbers are great for finishing touches and producing a smoother finish. Most woodworking projects will require several numbered paper grits — typically 40-80 — but if you’re uncertain what should be used, asking an experienced woodworker is always a good idea.
Choosing too coarse of a sandpaper can leave deep scratches in your project that will be difficult to remove later on down the line; too fine of a sandpaper often won’t remove any material at all. For example, if you are removing an old finish from your furniture piece and you want an attractive end result without deep scratches, you might start with 80 COARSE paper followed by 120 MEDIUM. Then work up through 180 FINE, 240 EXTRA FINE, and finally 320 ULTRA FINE. This practice may vary depending on other factors like type of finish, etc., but this general approach usually yields favorable results when refinishing furniture.

Sanding Techniques
Knowing which type of sanding techniques to use will give you the best results when it comes to refinishing furniture. With the right technique, you can get a smooth, uniform finish without leaving behind any scratches or ridges. Here are some tips on how to use a detail sander for various types of sanding projects.
Flat Sanding: Use a flat-backed piece of sandpaper and move it back and forth in an even motion across the surface of the material. You should start with a coarse-grit paper and work your way up to finer grits as needed until you get the desired result. Make sure to stay within the grain of the material whenever possible, working in straight strokes instead of circular strokes that could wear down grooves in wood.
These alternating motions will help remove larger chunks first, then finer particles over time when using different grits of paper. Be sure to keep your hand flat against the surface while you are moving it back and forth so that scratch marks are not left behind due to uneven pressure from your hand or fingertips pressing against parts unevenly. Tips on how much pressure to apply can be found in detail sander instructions included with most models by manufacturer.
Edge Sanding: Begin at one end of curved surfaces or edges and move up in small circular motions following the contours until you reach the other edge—while keeping your hand as steady as possible throughout this process. This kind of sanding is usually done using medium or fine-grit paper for furniture refinishing applications so that finer details such as adornments can be more clearly seen without any major gouged out texture from larger particles being left behind during coarse initial passes with heavier grit paper used for heavy distressed wood pieces in particular.
Explanation of the different sanding techniques that can be used with a detail sander
A detail sander can be used to refinish any piece of furniture in your home, from doors to banquet tables. Although this power tool is highly versatile, it’s important to understand the differences between different sanding techniques and how they affect the finish of your furniture. There are two main types of sanding — rough sanding and finish sanding.
Rough Sanding: The first step in refinishing furniture with a detail sander is to use the tool on coarser grits like 60 or 80-grit abrasive. This type of coarse sanding would usually be carried out with a belt sander or random orbital sander before starting to refine the item with finer grits. Rough sanding releases old paint, lacquers, sealants, and rough edges while also helping you achieve a uniform surface for more detailed work.
Finish Sanding: Once you have completed rougher work using coarser abrasives, prepare for final preparation using finer muds such as 180 or 220-grit paper. This will bring out a very smooth finish to the wood before staining and finials are applied in further stages of furniture production or repair. It is important that no circular motion is used because this will create unsightly concentric lines on the surface due to mistaking reflective polished surfaces for unfinished surfaces during finishing work only end up lengthening time here time unnecessarily later on repairs down the road when evidence can easily remain visible also damaging its new surface coatings over time as well especially if these discolorations remain visible. Take care when reaching tight corners and irregular shapes as well by applying pressure evenly around these points evenly while maintaining an even pressure throughout each area being detailed.
Tips for achieving a smooth and even finish
When refinishing furniture, it’s important to achieve a smooth and even finish. One of the most effective tools for creating this kind of result is a detail sander. Detail sanders are ideal because they provide good control over the sanding process and help to reach hard-to-reach places. To get the best results, there are some tips you should consider when using a detail sander.
First, always be sure to wear protective gear such as breathing masks and gloves while sanding. This will help protect your skin and lungs from toxic particles in the air created by sanding. You should also use caution on delicate or vulnerable surfaces which may be more susceptible to damage from abrasive materials.
Second, it’s important to choose the correct type of sandpaper for the job at hand. Different types of paper will offer different levels of coarseness with various grit grades available depending on what you need for a particular project or material surface being worked with. Additionally, different materials are best worked with different techniques so be sure to do some research into what works best before beginning your project, as this can really impact how successful your refinishing effort will be in achieving a smooth finish overall.
Lastly, pay attention to how quickly you move the sander while sanding furniture surfaces; slower movement allows more thorough but gentle abrasion which helps achieve a smoother result compared to rougher rapid movements which can lead to uneven patches being left on wood surfaces after being worked with a sander tool. Additionally, during certain stages people may opt for moving lightly across surfaces and then going back over them rather than moving around too quickly all at once as this can create inconsistencies in results due to missed areas and patchy coverage afterwards if not done correctly – taking your time is key!
Staining and Finishing
After you have used the detail sander to sand your furniture piece, it’s time to decide on the finish. Depending on the grain of the wood, you may have to stain your furniture with a wood finish or paint. Both options can be applied with a brush however each will have their own processes.
When staining wood, you must first start by selecting your preferred wood finish before ultimately applying it. Stick to quick-drying formulas for ease of use and quicker turnaround time for more efficient project completion. Once selected, begin by preparing the surface using a damp rag to clean any dust and debris that may remain from sanding prior.
Then apply a single coat of stain using either an oil- or water-based formula; read application instructions on product label as this varies based on type of formula used. Allow adequate drying time before applying additional coats as needed (up to 3-4 coats, depending on desired color). Lastly, protect and seal stained areas using either varnish or wax depending on depth of color attempted; read application instructions vary based on product label here as well.
When finishing with paint, the process is very similar in terms of surface preparation; once again, start by cleaning any dust and dirt off with a damp cloth. Apply at least two coats of paint over entire area — again, following specific instructions provided according to product label — ensuring proper drying time between coats for optimal results in coverage and appearance obtained. Finally, protect painted surfaces using shellac or other suitable protection layer available per manufacturer’s instructions provided on product packaging for best results achieved in durability and protection desired.
Explanation of how to choose the right stain for the furniture
When selecting a stain color to refinish your furniture, it is important to first understand the qualities of the wood. Some woods stain differently than others and will require a transparent or opaque finish. Understanding the wood used in the piece you are refurbishing is essential to achieveing the desired result.
If you are not familiar with wood grain, you can use a magnifying glass to examine it closely. Different woods will have different grain patterns, which can be helpful in determining what type of finish is best suited to your piece. For example, pine has a uniform grain pattern that often looks best when given an opaque finish; whereas oak may do better with a more transparent finish as its grain pattern tends to lend itself well to these finishes.
Stain colors should also enhance the natural beauty of the wood grain and add character to your furniture piece. For instance, if you want a dark finish for mahogany furniture, you may wish for an espresso-colored stain. However, defining your desired look before purchasing your stains will help ensure satisfaction with the final outcome.
In addition, consider what type of topcoat or sealer will work best for you depending on how much protection is desired and whether glossy or matte finishes are preferred. Lastly, always utilize protective gloves and masks when working with stains or sealers as some materials may contain hazardous fumes that can irritate skin and lungs if inhaled or ingested in dust form.
Tips for applying the stain and finish
Once the sander has done its job and you have thoroughly cleaned away sanding dust, you’re ready to apply the finish of your choice. Whether it’s a water-based or oil-based stain and finish, there are certain tips to keep in mind for a professional finish:
- Do a small test area first: Test an inconspicuous area on your piece before committing to the whole project. This will help you make sure that any finishing product or technique you use has satisfactory results.
- Apply pre-stain wood conditioner or sanding sealer before staining: This will help ensure even staining and prevent streaking. It also creates a barrier between porous wood fibers, such as oak and maple, and the stain color; this prevents the stain from absorbing too quickly into the wood.
- Apply a thin coat of stain: Use a brush or cloth to apply the stain; if needed, give the stained surface a light buffing with steel wool prior to re-applying additional coats of stain until desired tones are achieved. When using multiple coats, be sure to allow ample dry time between each application for best results.
- Apply topcoat of polyurethane (for extra protection): Polyurethanes protect furniture from wear and tear as well as ultraviolet rays that can fade furniture over time. When applying polyurethane topcoats use smooth strokes with quality tools for best results – brush, roller or sponge applicator work well when applying polyurethane finishes; avoid using too much pressure on the applicator during application as this may cause bubbles in the finish.
Conclusion
A detail sander is an invaluable tool to have in your woodworking collection. With the right technique and practice, you can refinish furniture with a professional finish that’s sure to impress. By following the steps in this guide, you can start sanding down furniture like a pro! Be sure to use the right protective gear, use proper sandpaper grits, and apply a finish that best suits your project.
Sanding furniture can be therapeutic and an enjoyable experience when done properly and with safety in mind. With the right preparation and technique, you can transform any old piece of furniture into something new again. Have fun refinished your furniture pieces and enjoy the transformation!
FAQ’S
Can you use a detail sander for furniture?
Yes, a detail sander can be used for sanding furniture, especially for those with intricate details.
How do you sand furniture with details?
Sand furniture with details by using a detail sander or sanding manually with a small piece of sandpaper. Start with a coarse grit and gradually move to a finer grit to avoid damaging the details.
What is the best way to sand furniture for refinishing?
The best way to sand furniture for refinishing is to start with a coarse grit sandpaper and then gradually move to a finer grit. Sand in the direction of the wood grain and use a sanding block or machine to ensure even sanding.
How to refinish wood furniture with details?
To refinish wood furniture with details, start by sanding the surface with a detail sander or sandpaper. Then, apply a wood conditioner and stain or paint, depending on the desired finish.
What is the difference between a detail sander and a finishing sander?
A detail sander is used for sanding hard-to-reach areas and intricate details, while a finishing sander is used for smoothing and finishing larger surfaces.
What grit sandpaper is best for refinishing furniture?
Start with a coarse grit sandpaper (60-80 grit) to remove any old finishes or imperfections. Then, move to a medium grit (120-150 grit) for general sanding and finish with a fine grit (220-240 grit) for a smooth finish.
Can you use detail sander for wood?
Yes, a detail sander can be used for sanding wood, especially for those with intricate details.
What is the advantage of detail sander?
The advantage of a detail sander is that it can reach and sand areas that are difficult to reach with other sanders, such as corners, edges, and tight spaces.
What sander is best for removing varnish?
A belt sander or a random orbital sander with a coarse grit sandpaper (40-60 grit) is best for removing varnish from large, flat surfaces. A detail sander can be used for hard-to-reach areas and corners.
Can I use a detail sander on cabinets?
Yes, a detail sander can be used on cabinets, especially for those with intricate details and hard-to-reach areas. However, be careful not to sand too aggressively or you may damage the wood or finish.
See more:
- Best palm sander 2023
- Best random orbital sander 2023
- Best sander 2023
- Best sander for deck 2023
- Best sander for drywall 2023


