Are you finding it difficult to select the right benchtop sander for your project? This article provides a comprehensive guide to choosing the perfect benchtop sander. You will find useful information about several types of sanders, their advantages and disadvantages, and essential things to consider before making a purchase.
So let’s begin our journey towards finding the right sander!
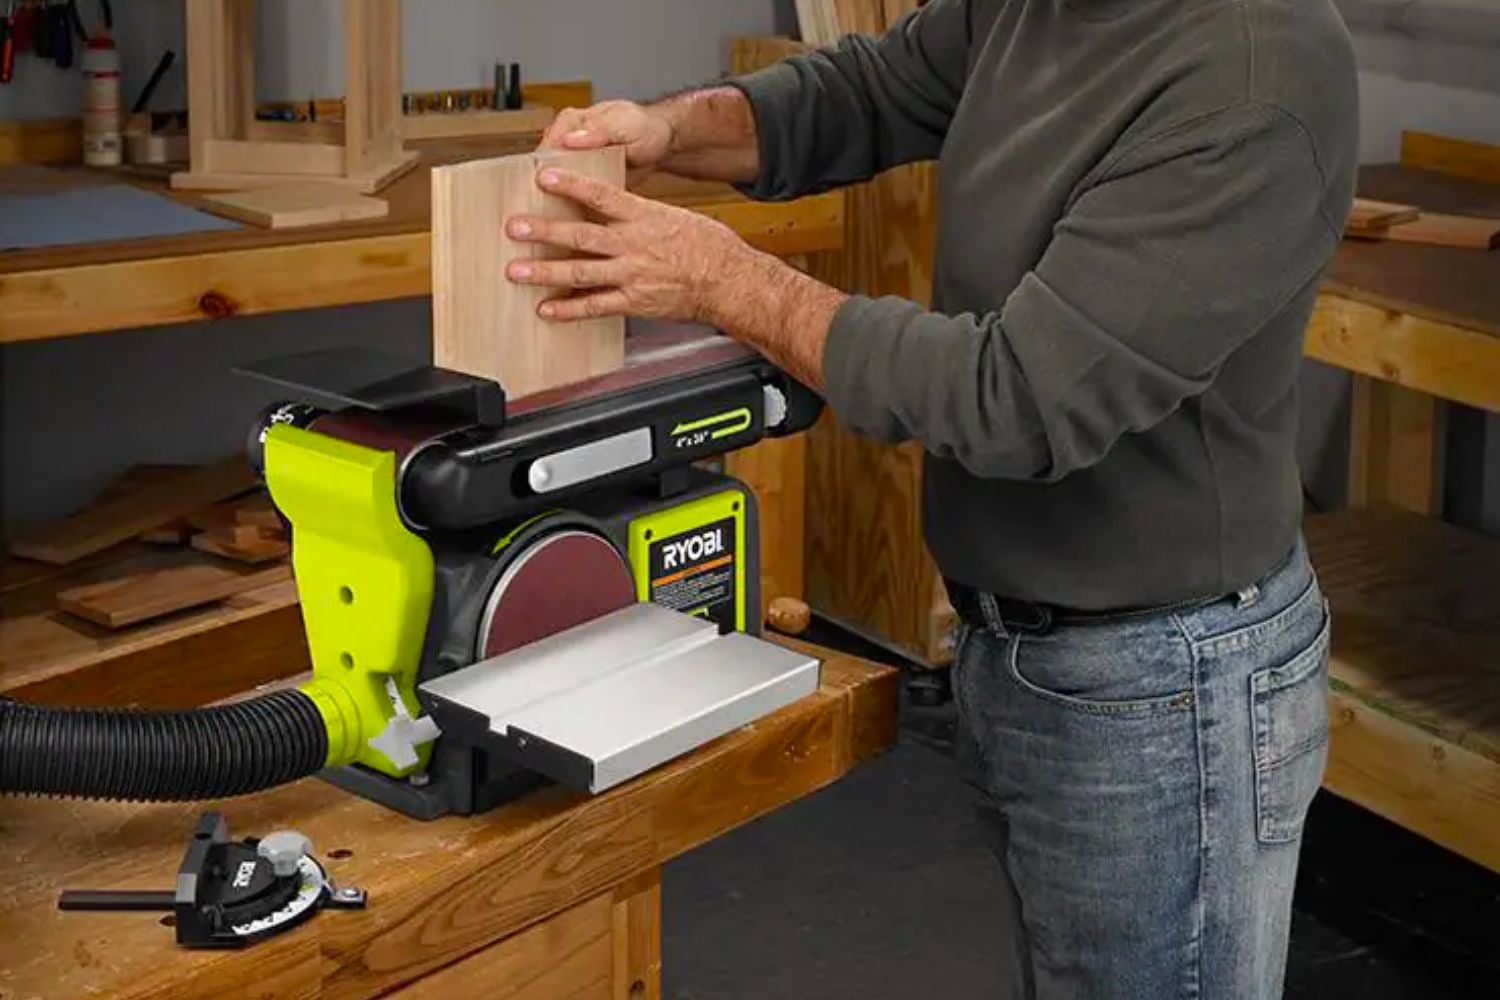
Benchtop sanders are the perfect tool for a variety of woodworking projects. From furniture making to home improvement projects, these machines can help you achieve a professional finish. Whether you’re looking for an orbital sander, belt sander, or combination machine, there is sure to be a model that works for your budget and needs.
Before settling on any one benchtop sander, it’s important to understand their features and functions so you make the most out of this powerful tool. This guide covers everything from basic construction methods to the more advanced features available on some models. We’ll explore different types of benchtop sanders, explain how they work and discuss the pros and cons of each design. In addition to comparing each type of sander by its performance characteristics we’ll discuss safety tips and recommended accessories. By the end of this guide you will have all the knowledge needed to confidently select the best benchtop sander for your needs.
Factors to Consider When Choosing a Benchtop Sander
When deciding which benchtop sander to purchase, there are several factors to consider. First off, the power of the sander should be appropriate for the work surface. If the sanding job requires more power than the sander can handle, it could result in poor results and could potentially damage your project.
Secondly, it is important to look at the type of sandpaper used and how easily it can be changed out between tasks. Some tools come with a quick-change system so that you can change from coarse to fine grit without having to waste time unscrewing screws or other mechanisms.
Additionally, you should consider what type of dust collection system you need or want in order to keep your work area free from sawdust and other airborne particles.
Finally, you’ll want to factor weight in as a deciding factor; heavier sanders may take longer to move around but they tend to stand up better under consistent use compared with lighter models.
Power
When selecting a benchtop sander, it’s important to consider the power it yields and safety features. The type of sanding job you plan to do will help determine which model is right for you. Whether you are a hobbyist or professional woodworker, power is a critical factor when deciding which benchtop sander to choose.
The most common type of motor used in benchtop sanders is an induction motor with one horsepower (HP). In comparison, the commercial grade equivalent of this motor type typically has 1.5 HP. Depending on your workload, you’ll want to consider this when making your purchase decision as more power translates into higher performance capabilities and shorter completion times for large projects. Additionally, some models are capable of speed adjustments so that you can slow them down for more detailed work or speed them up for bulk sanding tasks.
When shopping for a benchtop sander, search for models with brake-stops that stop the tool immediately and dual-start functions which prevent accidental powering up; features that enhance user protection when using these machines. A must have safety feature on any quality bench top sander is an adjustable dust hood and exhaust port; not every model includes one in their design offerings so make sure to double check before buying if this feature is important to you during your purchase experience.
Speed
Despite the variable capabilities of benchtop sander tools, many come with different speeds available to suit your needs. It’s important that you consider the functionality of these tools carefully when making a selection and choosing a bench-top sander.
Most brands will vary in speed intensity, ranging from 2800 RPM up to 4500 RPM, however more advanced models may be able to reach even further than this. Generally, the higher the speed offered by each model, the quicker you will be able to complete your job or task at hand. Additionally, setting a higher speed allows for less aggressive sanding and smoother finish on whatever project piece it is doing.
Through our years of work in woodworking, we strongly believe that most jobs can exist within between 3000-3700 RPM range. As a general rule, if your project requires heavy material removal for deeper finishes then proceeding with greater speed settings should produce desirable results – however if careful attention is needed for finer details such as buffing and polishing then slower speeds should be used accordingly instead; this will help prevent any unwanted damage being done too quickly or leaving behind rough patches on your finished product which are hard to eliminate after completion.
Size
Size is an important factor to consider when choosing the right benchtop sander. Sanders come in varying sizes, from a ½” palm sander to a 15″ drum sander. Palm sanders are small and portable, but they aren’t powerful enough for heavier projects. For those jobs, benchtop jointers and planers work best as they offer more power and larger capacity.
Benchtop belt sanders provide:
- A flat table that allows for easy feeding of stock across its surface area
- Powerful motors for heavy-duty sanding
- Adjustable tables for irregularly shaped materials
- Vacuum ports for dust collection
- Adjustable speed settings
- Additional attachments such as edge sanders, scrubber plates, drum sanders and disc sanders
Depending on the size of your project and its components, you may need a variety of different sized benchtop Sanders. A 1” belt sander is good for everyday tasks while larger 13” to 15” units offer expanded features such as variable speed control or adjustable tables. Consider the size of your project before selecting the right model.
Dust collection system
A dust collection system which is specifically designed for your particular benchtop sander is important in order to keep your work environment clean and comfortable. The dust collection system helps capture and collect wood particles while you sand or shape wood pieces and it should be a key element when you choose a benchtop sander.
When selecting the right model, be sure to check if the machine has an integrated dust collection system, usually in the form of a vacuum connection feature. This feature allows you to connect it with a separate vacuum cleaner for the efficient removal of sawdust and debris generated during sanding operations. If it does not have this feature, check if there is an optional dust bag which can be attached by an adapter to capture all dry particles from the work area. Dust port sizes can vary between models, so look carefully when you’re considering various machines to find one that meets the requirements of your job and works effectively with your vacuum cleaner.
Price
In deciding the best benchtop sander for your shop, you must consider several variables – size, quality and cost. Price is often an important factor when selecting a sander. We have divided the available benchtop sanders into three categories: budget (under $100), mid-price ($100-$150) and premium ($150 and up) to help you determine which machine is right for your needs.
Budget Sander ($100 or less)
If you have a limited budget or only light duty work, then a budget benchtop sander is a good choice. Look for machines in the $70-$90 range that offer good power but will require more frequent belt changes to keep it running smoothly.
Mid-Price Sander ($100-150)
These sanders are good all-round options if you’re looking for power, versatility, durable construction and dependable performance. Expect to pay more for better quality machines with longer warranties, larger dust collection bags and adjustable speed settings for varied materials.
Premium Sander (Over $150)
For serious hobbyists with larger shops requiring production-level sanding or those who simply want top of the line features, then consider the heavy-duty models priced at over $150. These sanders offer all of the bells & whistles – variable speed control dials, long lasting belts and large dust collection systems – allowing you to operate at peak efficiency.

How to Use a Benchtop Sander
Using a benchtop sander to sand wood surfaces is simple and effective, but it’s important to take a few steps before you start to ensure the best results. Before using your benchtop sander, make sure the machine is properly installed in accordance with your manufacturer’s instructions. Here are some additional tips for using your benchtop sander:
-Gather all safety gear and wear it when operating the sander. Dust masks, helmets, ear protection, and other gear should always be worn as recommended by your machine manual.
-Select the right sandpaper grit for your application and secure it properly on the sander before beginning.
-Use only light pressure when sanding so you don’t leave unsightly ridges or damage the area surrounding what you’re sanding.
-Work with the grain of the wood whenever possible to avoid damaging or gouging its surface. Apply even pressure throughout each pass of the sander.
-Move around while sanding so that any dust buildup is prevented on either side of your surface area. This will also help keep dust particles out of areas where they could cause damage.
-When you are done sanding, examine both sides of your workpiece for signs of imperfections or unsanded areas that must be attended to before going ahead with assembly or finishing processes like painting or staining.
Safety measures
Working with benchtop sanders can be an incredibly rewarding process, but without taking the necessary safety measures, you can put yourself at risk for injury. Before you begin using a benchtop sander, it’s important to review some basic safety guidelines to ensure that your work environment is safe and that accidents are avoided. Here are a few tips to keep in mind:
- Wear safety gear such as safety glasses and hearing protection while working with a benchtop sander.
- Be sure to unplug the machine before adjusting, cleaning or making any adjustments or repairs.
- Inspect the sander and check for any loose screws or other parts before each use; if there are, take the time to repair or replace them first before beginning work.
- Work in a well-ventilated area, as airborne particles may be released into the air when sanding materials like wood or metal.
- If using a power sander with a dust collection system, make sure you always use the correct size filter bag for maximum efficiency and keep it clean for less dust when sanding materials of different textures and thicknesses; this will also help reduce any irritation from contaminants in the air due the airborne particles created by operating your sander without a dust extraction device attached that captures these particulate emitting from sanding operations.
- Keep fingers away from contact points where sharp edges may form from material being cut on the plate surface of rotating discs or even belts while sanding – these edges can easily cause cuts due friction during sanding operations
- Guide material on hand flat against table surfaces so parts don’t shift while moving during sanding operation and possible pinch fingers placed next to linear movement of belt driven surfaces which could inflict minor lacerations.
Preparation
Before using a benchtop sander, it is important to make sure that the material that you are sanding is properly prepared for the job. Depending on the project, there may be various steps necessary before beginning.
The type of wood or other material being used affects the preparation procedure. For wood, it should be planed and jointed if needed, and suitable for edge sanding to deal with any “tear outs”.
Additionally, pre-finish materials such as veneers or laminates must be sanded before they can be applied; otherwise they will cause surface defects once finished. Sanding also needs to be done before staining or varnishing to get an even finish after application.
On softwoods like pine and cedar, use sandpaper up to 120 grit for hand sanding followed by 180 grit on an orbital sander in preparation for staining or painting. On hardwoods like oak and walnut, you’ll want to step up your grit sizes from 120 to 150 then 220 or higher; if sealing afterwards with stain or varnish then use complete grit sequence from 120 through 320 followed by 400+. Finally, mask off areas you don’t want affected by dust particles during sanding.
Operation
Before learning how to use a benchtop sander effectively, it’s important to understand the correct operating procedure. When turning on the sander, make sure you stand behind it at a comfortable distance and let the machine come up to its full speed before you start sanding.
It is best practice to always sand with the grain of your workpiece. Push the workpiece lightly and evenly over the sander until it has been thoroughly smoothed down. Make sure you overlap each stroke slightly so that all surfaces of the workpiece are sanded uniformly. Use both hands to hold the workpiece securely in place while keeping your arms straight and operating at low levels of pressure.
In order to minimize interference, cut away material on edges by staying off the edge of your workpiece while making sure that all wanted material is removed from surface areas near your working area. It is important not to leave any burrs or scratches after use as these can affect your final finish. Finally, allow for dust collection when finishing a surface by using dust collection bags or attachable collection units provided by some manufacturers for proper management of dust particles created while sanding a piece of wood.
Maintenance
It is important to maintain your benchtop sander properly in order to ensure its optimal performance and longevity. While there are a few different designs, we will focus on the belt, disk, and drum models in this section.
For a belt sander, check the belt regularly for any damage or wear and replace if required. Clean the inside of the sander periodically with a brush or vacuum attachment. Make sure to replace any worn or frayed power cords as soon as possible.
For a disk sander, check regularly for any damages that may have accumulated on sanding discs and make sure they are firmly attached to the tool’s base plate. Brush off any dust or debris that has accumulated over time and replace worn-out bearings when necessary. Check the tension of the drive belts regularly—they should be neither too tight nor too loose—and change the lubricant on these belts when needed.
Finally, for drum sanders, inspect for worn-out abrasive cloths regularly and monitor their alignment; misaligned fabric can create uneven surfaces in wood pieces being worked upon by drum sanders. Ensure that dust bags are firmly attached to keep sawdust away from motor components as well as outfeed roller bearings where it can cause friction and damage these components over time.
Conclusion
Thanks for taking the time to read through this comprehensive guide to benchtop sanders. We hope that now you feel more informed and ready to make a confident decision when it comes to investing in the right benchtop sander for you.
Remember that buying the right tool is only half of the battle; make sure you are careful with your choice of power cords and safety gear, as well as always following safety guidelines when using your new tool.
We wish you success on all your woodworking projects!
FAQ’S
What type of benchtop sander do I need?
The type of benchtop sander you need depends on the type of project you will be working on. Belt sanders are ideal for larger projects, while disc sanders are better for smaller, more detailed work.
What are the 4 types of sanders?
The 4 types of sanders are belt sanders, disc sanders, orbital sanders, and random orbit sanders.
What are the 3 most important sander Safety Rules?
The 3 most important sander safety rules are to wear eye and ear protection, avoid loose clothing and jewelry, and keep your hands away from the sanding surface.
What is a bench top sander used for?
A bench top sander is used for sanding and shaping wood, metal, and other materials. It can be used for a variety of projects, from smoothing rough edges to shaping intricate details.
Which sander is best for beginners?
An orbital sander is best for beginners, as it is easy to use and produces a smooth finish. It is also less likely to damage the surface being sanded.
What grit is best for bench sander?
The best grit for a bench sander depends on the type of material being sanded and the desired finish. Generally, a coarser grit is used for removing material, while a finer grit is used for finishing.
Which sander is most versatile?
A random orbit sander is the most versatile, as it can be used for a wide range of projects and produces a smooth, swirl-free finish.
What type of sander is best for home projects?
An orbital sander is best for home projects, as it is versatile, easy to use, and produces a smooth finish.
What style of sander is best?
The best style of sander depends on the type of project you will be working on. Belt sanders are best for large, flat surfaces, while orbital sanders are better for smaller, more detailed work.
What is the difference between a bench grinder and sander?
A bench grinder is designed for sharpening, shaping, and polishing metal, while a sander is used for sanding and shaping wood, metal, and other materials. The two tools are not interchangeable.
See more:
- Best belt sander 2023
- Best benchtop sander 2023
- Best cabinet sander 2023
- Best detail sander 2023
- Best disc sander 2023


