Sick of struggling to work on DIY projects? You’re in luck. With a handheld belt sander, you can make easy work of it.
Make tedious tasks simple and get the job done faster with this comprehensive guide on how to use a handheld belt sander for DIY projects.
This guide is designed to provide an introduction on how to use a handheld belt sander for DIY projects. A handheld belt sander is a tool that can be used for anything from basic woodworking to deck maintenance, and it offers the advantage of being both powerful and lightweight.
This guide will discuss how to select the right type of sander, how to set up the tool, and how best to use it in different situations. By reading this guide, you will learn the basics of using a handheld belt sander safely and effectively and be better prepared for performing future home improvement or repair tasks.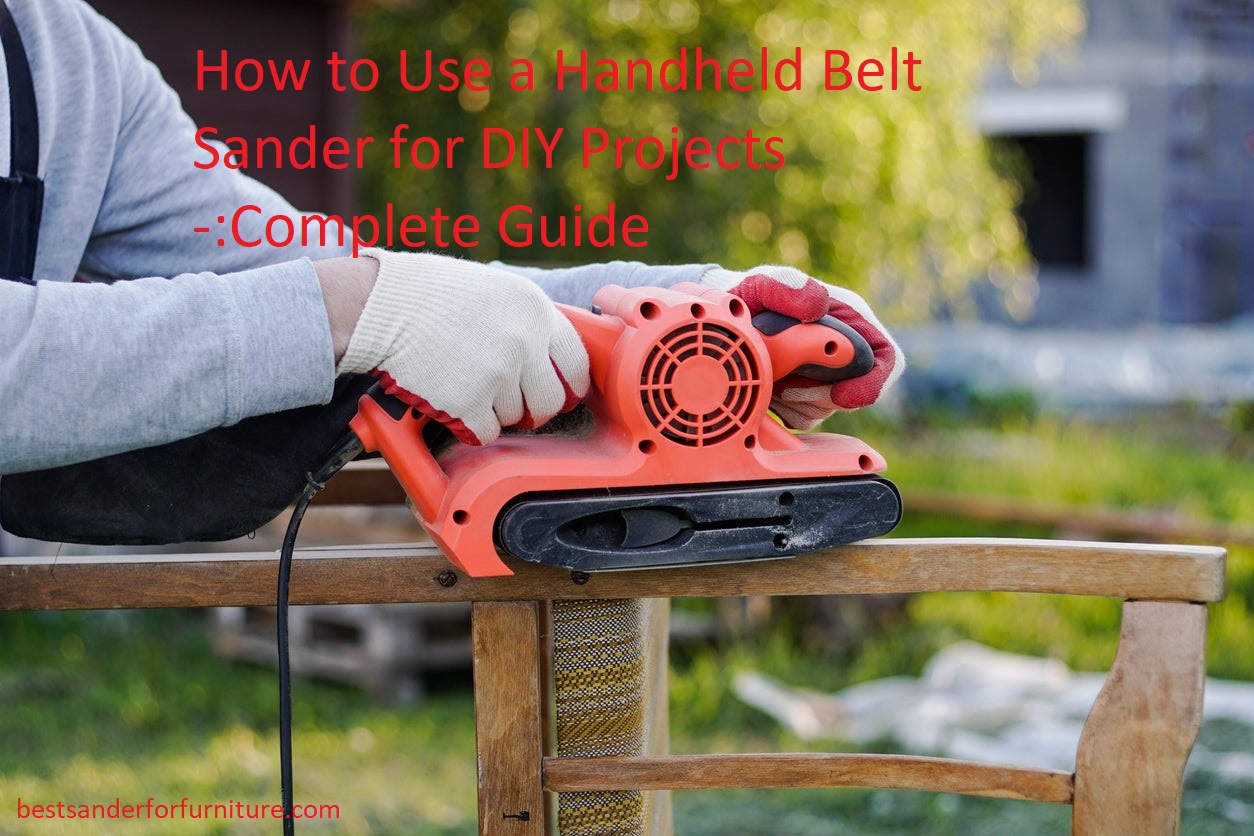
Safety Precautions
When using a handheld belt sander, it’s important to take all of the necessary safety precautions. Without taking the proper steps and wearing the proper protective gear, you could be putting yourself in danger. Here are some safety tips that you should keep in mind when working with this tool:
- Always wear eye protection when using the sander. The dust and debris generated by the sanding process can cause significant harm to your eyes, so always make sure that you’re wearing safety glasses or goggles while using it.
- Wear a face mask or respirator when sanding for extended periods of time to protect yourself from inhalation of airborne particles.
- Wear gloves to prevent skin irritation due to contact with coarse-grit abrasives and sharp edges on finished surfaces produced during sanding operations.
- Make sure that your sander is securely mounted and secured before starting it up – either on an oscillating stand or a table if you’re mounting by hand – but also keep a firm grip on the tool whenever operatng at high speed and pay attention to any signs of vibration or instability in your workpiece as you work with them. Don’t use force—it will only damage material being machined and can potentially cause injury, as well.
Importance of safety when using a handheld belt sander
Using a handheld belt sander can be a helpful tool when working on DIY projects, but it is important to keep safety in mind while operating this type of equipment. Handheld belt sanders can be dangerous if not used properly, as they can cause serious injury. It is essential to have a clear understanding and knowledge of using this type of tool before embarking on any DIY project that requires its use.
Before using a handheld belt sander, you should take the time to read through the instruction manual and familiarize yourself with all safety warnings and procedures. Never operate the sander without wearing appropriate protective gear such as eye wear, gloves, and hearing protection. Additionally, make sure that you are aware of all proper techniques for holding the sander during use and ensure that the belt is securely fastened so it does not slip during operation.
You should also use common sense when operating a handheld belt sander by never pushing down hard on the tool or point it in anyone’s direction but your own. If possible, avoid sanding close to your body or an adjacent object such as furniture or walls as this could cause objects to become airborne from being kicked up from the belt. Make sure that you are aware of where your hands are located at all times during operation so you do not become injured by coming into contact with moving parts or sharp edges produced by sanding operations. Once finished using the sander, make sure that it is unplugged before packing it away until its next use.
Personal protective equipment required
Personal protective equipment is always necessary when using a handheld belt sander. This includes long pants and a long sleeve shirt to avoid any cuts, burns, or abrasions from the sander accidentally coming in contact with your skin. Additionally, be sure to always wear safety glasses and a dust mask. Noise protection (ear plugs or muffs) is also recommended to reduce the sound level from the sander’s motor.
Lastly, wearing work gloves can help keep your hands safe when working around moving parts and sharp edges. When using any power tool remember that it is best to be over-prepared than under-prepared and that your own safety should never be compromised for convenience or time savings.
Common safety precautions
Safety should always be the number one priority when using any type of power tool. Handheld belt sanders are no exception — they are powerful and dangerous tools that should be used with caution. Before beginning any project, make sure you understand the potential risks and know how to protect yourself accordingly.
When working with a belt sander, use the following precautions:
- Wear safety glasses to protect your eyes from flying dust and chips.
- Use a dust mask and ear protection to protect your lungs and ears from dangerous fumes or noises.
- Avoid loose clothing, jewelry, or anything else that may get caught in the sander’s parts as it runs.
- Be aware of other people in the vicinity of your work area who could be harmed by flying particles or by your operating the sander too close to them.
- Make sure that you have a secure grip on the sander at all times while operating it. Do not attempt to keep a tight grip on any part of the belt during operation, as this can cause injury if it slips or moves unexpectedly.
- Ensure you have adequate ventilation in your work area before using a belt sander – this is especially important if finishing materials such as paint, varnish, or sealants are being used on wood or other surfaces nearby!
- Secure any material being sanded down firmly so that it doesn’t slip away during operation — it’s easy for pieces of wood to kick back unexpectedly due to the force generated by a powerful belt sander!

Using a Handheld Belt Sander
Using a handheld belt sander properly is key to achieving your desired results. To get started, you’ll need to select the right size and grit of sandpaper for your workpiece. Next, make sure the area to be sanded is clean, dry and free of dust particles or other debris.
You should always have a firm grip on the sander when in use and direct it towards the surface of the wood with an even pressure. Move it back and forth in short strokes across the grain of the wood, taking care not to apply too much pressure as it can damage or burn the surface you are sanding. Make sure you regularly inspect your work for any signs of burning as this can significantly reduce the strength and durability of your finished piece. To reduce any risk of over-sanding a surface area, you might consider using multiple grades of belt sander starting with a finer grit sandpaper at first and working up through coarseness if needed.
When finished using your handheld belt sander, make sure to turn off electric power completely and use safety glasses while removing spent sandpaper from your machine. Maintain proper machine upkeep by cleaning out dust and dirt from areas around vents with compressed air after each use, making sure to wear protective gloves if necessary for complete safety during this process.
Preparation before using the handheld belt sander
Using a handheld belt sander for DIY projects is an effective way to smooth and sand hardwood, metal and other materials. This type of sander is versatile and easy to use, but it can also be dangerous if you are not careful when operating it. Before you begin your project, there are some essential steps required to ensure proper safety and satisfactory results.
First, inspect your belt sander before using it to make sure all its parts are in good condition and functioning correctly. Check that the power cord is securely attached and the drive belt has no signs of wear or cracking. If any of these components require replacement or repairs, contact the manufacturer or a servicing center before proceeding.
Second, make sure your workspace is clear of any debris or hazardous objects that could get caught in the sander’s belt or otherwise impede its function while in operation. Additionally, make certain the work piece is firmly secured after attaching it to your work table with appropriate clamps so that it does not move around while sanding
Finally, put on safety equipment such as eye protection, hearing protection, dust mask and protective gloves for both arms prior to turning on the machine. Reduction of these precautions can significantly increase your chances of suffering from serious injuries from accidents during use. After completing all these steps you will be ready to start using your handheld belt sander for DIY projects like a pro!
Step-by-step guide on how to use the handheld belt sander
A handheld belt sander is an essential tool for DIY home improvement projects. This powerful tool is designed to quickly sand down surfaces like wood or metal and can save you time, money, and hassle. Although intimidating in size, handheld belt sanders are relatively easy to use. With proper safety precautions and following the step-by-step guide below, you’ll be able to confidently make the most of this powerful tool.
- Start by inspecting your sander before you begin your project. Be sure that any guards or dust bags are fully functional and securely fastened before turning on the sander.
- Also check if there are any loose screws or worn parts on the machine — never use it if there are any broken pieces.
- Wear the necessary protective gear — goggles, respirator, ear muffs — while handling your sander as it will protect you from dangerous particles flying out of the machine during operation.
- Make sure that you have a firm grip on your sander at all times when in operation as it may slip from your hands due to its weight and vibrations caused by its powerful motor when running at full speed for longer periods of time.
- Set up a flat and stable surface for using the sander with no objects around which could be affected by its vibrations. If using along an edge, mount it securely according to manufacturer recommendations.
- Securely fix the workpiece (such as laid flat onto a bench) ensuring that it does not move during operation. You can also secure clamps along either side of your work for longer pieces of wood or other materials.
- Turn on your hammer before starting sanding with pressure against the materials surface moving slowly over it making sure that there is no skipping against material surface, otherwise causing early damage to workpiece being worked on, also vary angle while pressing steadily down making more frequent circular inch marks across grain pattern being worked on: be sure not to apply too much pressure changing idle if needed avoiding excess wear & tear over extended periods of usage.
- Shut off & unplug electric safety after each use when stored away clean with dry cloth given blowing dust away preventing electrical issue while off guard; always read instructions before operating machine first!
Maintaining Your Handheld Belt Sander
It is important to keep your handheld belt sander in optimal condition to ensure that it runs smoothly and safely. After each use, be sure to inspect the sander for any signs of damage or wear and tear, and make any necessary repairs or replacements before resuming work with the tool. Additionally, be sure to clean all debris from the sanding surface and dust collection hose regularly to help maintain the life of your machine.
Additionally, you should pay attention to regular maintenance tasks such as lubricating moving parts with a light oil or grease and replacing worn out drive belts. With proper maintenance, your handheld belt sander should last through many DIY projects.
Importance of maintaining your handheld belt sander
In order to ensure its accuracy and persistence, it is necessary to properly maintain your handheld belt sander. You should ensure that it is kept clean after every project. Clean your sander by using a cloth or brush to gently remove any wood chips, dust, and other debris from the body of the sander, the belt track, and the tensioning screws.
Additionally, double-check the speed setting on your sander before beginning each project; this will help you minimize sanding marks or too-shallow finish depth on materials such as wood or paint. If either of these happens, take care to evenly sand to achieve desired results.
You’ll also want to check that all screws—including those that adjust tension on the belt—are tight and secure before beginning a project. If you’re undertaking projects with a wide variety of surfaces or different drive speeds, you can check and adjust belt tension as needed; just make sure the screws are snugly secured when finished.
Finally, regularly inspect the condition of your sander’s drive belts: if frayed edges appear after extended use (or if they seem excessively worn), replace them immediately for better efficiency and performance. Following these best practices can help ensure reliable use for many future DIY projects!
Steps to properly maintain your handheld belt sander
If you plan on using your handheld belt sander for DIY projects, it’s important to maintain the sander properly in order to keep it in top working condition. Proper maintenance helps to extend the life of your belt sander and protect against any accidents or injuries that can occur. Here are some steps you should follow for proper maintenance of a handheld belt sander:
- Make sure the motor is in good shape by checking the brushes and wires for any damage or wear and tear. If you notice anything wrong, replace the parts with new ones from the store.
- Examine your belt often to make sure there are no cracks or excessive wear before using it on any project. When replacing a belt, make sure that it is firmly attached so that it will not come off while usingthe tool.
- Clean dust and other debris off of your sanding surface regularly with a damp rag or equipment-safe vacuum cleaner attachment. This will help reduce clogging and increase efficiency when sanding difficult surfaces such as metal, plastic and hardwoods.
- When finished using your sander always turn it off completely before setting it down on any work surfaces – this will help avoid potential injuries due to an unexpected start up when turning back on again at a later time!
- Store your tool in a safe place, out of reach of children or pets, away from excessive heat sources such as stoves or fireplaces where harmful vapors may build up over time causing damage to components like motors and belts alike!
Troubleshooting common problems
Troubleshooting common problems with your handheld belt sander can help keep your DIY projects running smoothly. Before you get started on any project, it is important to make sure that the belt sander is properly loaded and tensioned. This ensures that the belt tracking stays true and that there will be fewer bumps and ridges in the finished surface.
It is also important to inspect your belts regularly for signs of wear or damage; replace them if necessary. Cleaning will also help to keep your handheld belt sander working efficiently; remove dust between uses and check for a buildup of debris or sandpaper residue that might impede functionality. Always lubricate moving parts before use, as dry operation can cause reduced performance and even damage to the motor or other components.
Common problems include motor failure due to excessive pressure applied to the work surface, decrease in speed or noise of the sanding process, dust collection difficulties due to clogged filters or chutes, damaged belts caused by loading error or debris on work surface, or tool not turning off after use. If these scenarios occur while using a handheld belt sander, stop working immediately and troubleshoot until you have determined an apt solution. Action may include replacing wearing parts such as belts and filters, adjusting tension settings on roller arms or reducing pressure applied while sanding. Following proper operating instructions is always recommended when using any power tools to avoid potential risks of injury due to misuse.
Conclusion
A handheld belt sander is an incredibly versatile addition to your toolbox that can assist with a wide range of DIY tasks. When used correctly, it helps to make difficult jobs easier and cut down on the amount of time it takes to complete projects.
Safety should always be the top priority when using a handheld belt sander, as improper use can lead to serious injury. Always wear protective gear such as goggles, gloves, and dust masks; pay attention to the pressure you’re applying and never force the tool into sharp angles or corners; keep the speed level consistent; and make sure you sand with the grain instead of against it. In addition, remember to inspect belts regularly for wear and tear, and replace them when needed.
By following these easy tips and techniques outlined in this guide, you’ll get the most out of your handheld belt sander for all your DIY projects. Whether you are planing an old piece of wood or refinishing furniture, a handheld belt sander will help ensure every job is done right!
FAQ’S
What do you use a handheld belt sander for?
A handheld belt sander is typically used for removing material quickly and efficiently, such as when sanding large areas or rough surfaces.
How do you use a belt sander for beginners?
To use a belt sander for beginners, you should read the user manual carefully, choose the right grit sandpaper, hold the sander firmly with both hands, and move it back and forth in the direction of the grain.
Can a belt sander only be handheld?
No, belt sanders can come in both handheld and stationary models.
What materials can you use on a belt sander?
Belt sanders can be used on a variety of materials, including wood, metal, and plastic.
What not to do with a belt sander?
You should never use a belt sander without eye and ear protection, use it on a wet surface, or force it to remove material too quickly.
What is the difference between a hand sander and a belt sander?
A hand sander is usually smaller and less powerful than a belt sander, and is typically used for finish work and detail sanding. A belt sander, on the other hand, is usually larger and more powerful, and is used for removing material quickly.
Can a belt sander remove paint?
Yes, a belt sander can be used to remove paint, but you should use a lower grit sandpaper and be careful not to damage the underlying surface.
Do you push or pull belt sander?
You should move the belt sander back and forth in the direction of the grain, applying even pressure and letting the sander do the work.
How much material can you remove with a belt sander?
A belt sander can remove a significant amount of material quickly, but the amount will depend on the grit of the sandpaper and the power of the sander.
What grit sandpaper to smooth wood?
To smooth wood, you should start with a low grit sandpaper, such as 80 or 100 grit, and then gradually move up to higher grits, such as 150 or 220 grit.
See more:
- Best sander 2023
- Best sander for deck 2023
- Best sander for drywall 2023
- Best sander for furniture 2023
- Best sander for hardwood floors 2023


