Are you looking for the best solutions to sand your furniture with a palm sander? You’ve come to the right place!
We’ll give you all the tips and tricks on how to achieve a smooth finish and make sure your project is a success. Don’t worry, we’ll make it simple and easy – just follow our advice!
Understanding the basics of sanding and knowing which type of sandpaper to use is essential for achieving professional and satisfactory results. Sanding can be done by hand or using power tools like palm and belt sanders. If you are looking for a simple and lightweight tool for small projects or a tricky area, then a palm sander is ideal.
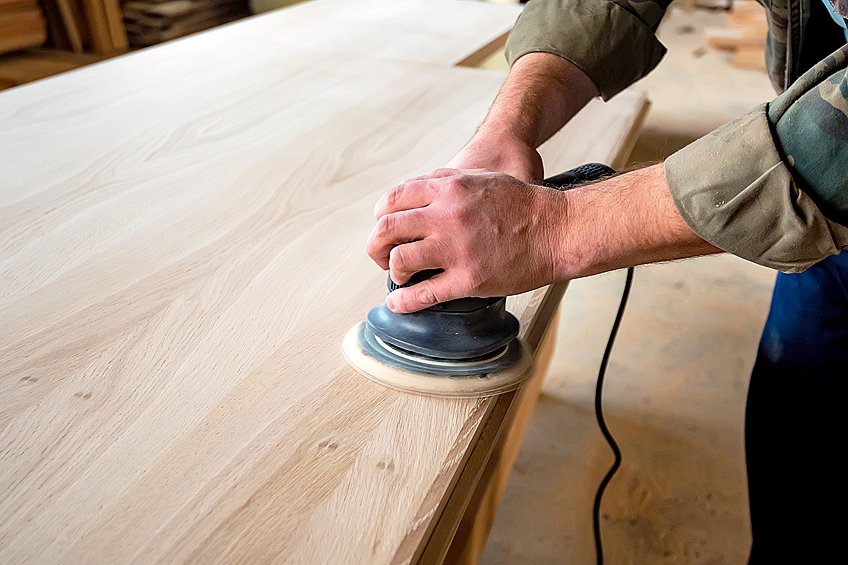
A palm sander is an electric-powered tool used mainly to remove excess material from surfaces and clean up joints in furniture pieces. It has an oscillating motion that rapidly vibrates the surface being worked on and helps remove imperfections quickly while maintaining a smooth finish. With the right knowledge, you can easily use a palm sander to refinish wood furniture with perfect results. In this guide, we will discuss the different types of materials used in sanding process, how to use the right techniques with your palm sander, and essential safety tips when working with wood shop power tools.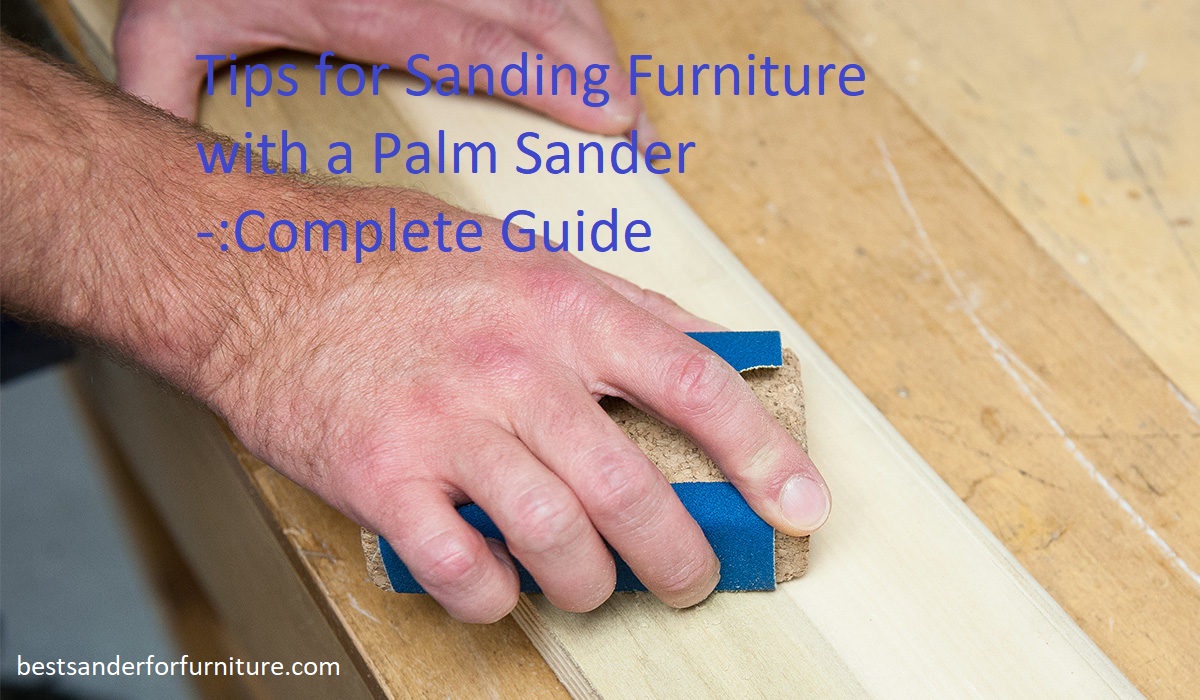
Choosing the Right Palm Sander
When it comes to choosing a palm sander, there are two main types you’ll want to consider. Orbital sanders and random orbit sanders.
An orbital sander is ideal for a light- to medium-duty job. It moves in small, circular orbits and can be used to remove material quickly and evenly. However, the circles can leave an undesirable pattern on the surface that takes extra sanding or wet using abrasives or wood filler to fix.
A random orbit sander is the best choice if you’re looking for a smoother finish that won’t require much follow-up work. The random orbits create a less obvious pattern which generally requires less follow up sanding when compared with orbital sanders. They are also more suitable for heavier duty jobs and can save you time in the long run by not needing multiple passes such as when using orbital sanders.
Whether you go with an orbital or random orbit sander, there are several factors you should consider before deciding which one to purchase: size of the disc (measured in inches); power (measured in amps; gauge of cord; type of action—rotation and/or oscillation; speed setting; weight; dust collection accessories; rubber handles for comfortable grip; noise level, extension cords if needed —all of which play a role in helping you get great results from your project.
Features to consider when choosing a palm sander
When selecting a palm sander, you’ll want to look for features that enhance your experience and ensure that you get a product that performs optimally. Here are some features to consider when choosing a palm sander:
Size: Palm sanders come in different sizes, so you will want to choose one that best fits the job at hand. Smaller sanders are great for tight spaces and more precise sanding jobs, while larger sanders offer better power and control for tackling larger projects.
Power Source: Palm sander models range from those with the traditional corded power source (requiring an electric outlet) to more recent cordless styles powered by batteries. Read reviews of individual palm sanders, research their capabilities and select one that will accomplish the jobs you need it for without sacrificing tool longevity or performance.
Dust Collection: Many models include dust collection systems that can contain large amounts of dust during operation. These features help keep your work space neat and clean while you’re working, reducing time spent cleaning up after your project is complete – one less hassle when finishing any job!
Weight: When choosing a palm sander, its weight should always be taken into consideration as it will affect how much control you have over the tool while performing important tasks like edge sanding or finish work. Heavier forms offer enhanced stability but can quickly tire out your arms if applied too long, so have realistic expectations about the size of projects this type of sander is able to handle in order to alleviate any stress on your hands during use.
Preparing the Furniture for Sanding
Before starting sanding with a palm sander, it is important to do proper preparation. This will ensure that the furniture surface is prepped for sanding and that the desired results are achieved.
The first step to prepare is to clean the wooden surface and check for any flaws or defects. This includes any dust, dirt, oil, paint residues or bumps and knots which would create an uneven finish. If there are any flaws or defects on the surface they should be fixed before starting sanding. Once all of these steps have been taken care of and the surface has been cleaned, it’s time to begin preparing for sanding with a palm sander by using medium-grit sandpaper to remove all remaining paint or stain from the furniture piece.
After the initial cleaning step, each area of wood needs to be tapped lightly in order to locate areas that might need further attention. This is especially important if you’re working with vintage wood furniture as some pieces may conceal scratches and dents beneath the existing finish. To prepare these areas further, you’ll need a filler compound like sawdust mixed with wood glue which helps fill in any imperfections before you begin sanding them away with your palm sander. Abutting edges can also be worked on using a file or round sponge-type tool which helps blend them into one another smoothly before beginning sanding operations with a palm sander.
Removing any hardware or accessories
It is important to remove any hardware or accessories from the piece of furniture being sanded using a palm sander. This will ensure that all components are properly sanded and no part of the furniture is missed. In order to preserve the integrity of each item, it is best to use protective gloves when handling small pieces.
Additionally, it may be necessary to use a Phillips or flat screwdriver to remove any screws or hinges in order to get at the entire surface of the furniture. If you are unfamiliar with how the components are attached, take careful notes and photographs during disassembly in order to facilitate proper reassembly.
Cleaning the furniture
It’s important to carefully clean the furniture before you begin sanding. Removing dust, debris, primer, enamel or lacquer will allow the sander to work more efficiently. If extra material is left on the surface, it can clog the abrasive paper and cause a decrease in performance.
For most pieces of wooden furniture, you can use a vacuum cleaner to remove dust and particles. If there are stubborn pieces of debris caught in cracks and crevices, you can use a soft brush or cloth to carefully remove them by hand.
We recommend using a mild detergent and warm water solution to clean off any remaining oil or grease before beginning the sanding process. To make sure you get all the dirt out from corners and grooves use an old toothbrush for tougher scraping tasks.
Repairing any damages
Repairing any damages or blemishes in your furniture should be done before you begin sanding. This may sometimes require the use of a putty knife, wood filler, and/or epoxy to repair any gouges. Make sure that all repairs are completely done and dried before sanding. Any residual dust left behind can clog the sander’s filter over time, which can lead to acceleration issues and decrease its lifetime performance.
After the repair is finished, gently smooth out any remaining edges with medium-grit sandpaper.
Sanding Techniques
No two pieces of furniture are the same, so it is important to consider the grain of the wood and take into account any special features when you start sanding. It may also be useful to sand a small test area first in order to determine which type of technique and speed work best for the particular piece you are sanding.
When using a palm sander, it is important that you move it in circles or figure-eights in order for there to be even pressure on the surface. This will help ensure that no part of the wood goes unsanded and produce an even end result. Below is an overview of more specific techniques used in different stages of sanding:
-Coarse Sanding: When furniture requires extensive flattening or leveling, a coarse paper (such as 40 grit) should be used. This should only be done if absolutely necessary because it creates significant dust and grooves which must then be smoothed over with successive grades of finish paper;
-Medium Sanding: After coarse sanding has been completed, medium grade sandpaper (such as 80 grit) can then be used to remove any remaining deep scratches. If a great deal of material has been taken away with the coarser grade, several passes with 80-grit may be necessary;
-Fine Sanding: After medium sandpaper has completed its job, a fine grade paper (such as 120 or 220 grit) should then be used for final smoothing prior to finishing;
-Extra Fine Sanding: While not always necessary for every project, an extra fine paper such as 320 or 400 can also be used if desired for an even smoother end result prior to finishing;
-Wet Sanding: Wet sanding is often used on the final coat in order decrease friction and minimize airborn dust whilst increasing luster by polishing up tiny scratches created by previous levels of sandpaper. Normally this will involve using 320 or 400 grit wet/dry paper and gently working it over furniture until all required parts are fully polished.
Safety measures to take
Before beginning any sanding process, it is important to properly prepare and protect yourself to ensure a safe and effective sanding experience. Here are some key safety measures that you should take when using a palm sander:
- Wear protective gear: be sure to wear safety glasses, face mask, gloves and clothing that covers your entire body.
- Ensure the area is well ventilated: Proper ventilation is essential when sanding furniture with a palm sander. Be sure to open all windows and doors or turn on an exhaust fan if available.
- Unplug the power cable: Before you start any sanding work with the sander, make sure to unplug the power cord from the wall or switch off circuit breaker for added protection.
- Use motion sensors: Palm sanders come with motion sensors that will automatically shut off in case of an emergency or accidents such as dropping the sander or vibration due to too much friction while sanding. Always check that this feature is functional before you begin any sanding work.
Sandpaper grits to use
The coarseness of the sandpaper is defined by its grit number. Generally speaking, the higher the grit number you use, the smoother the finish you will get on your furniture. Smaller numbers represent more aggressive paper and bigger numbers mean a finer sanding.
There are several different grades of sandpaper used for sanding furniture according to your needs:
- Coarse – 40- to 80-grit – for heavy material removal or for wood that is very rough.
- Medium – 100- to 150-grit – for general purpose sanding and smoothing uneven surfaces.
- Fine – 180- to 220-grit – for light material removal, such as removing dust or minor scratches. It can also be used for light wood contour work, or on soft woods like pine and cedar where it’s not necessary to use a heavier grit.
- Very Fine – 240 to 320 grit – this is great for very smooth finishes on particle board and lacquer finishes, as well as paint layers that have build up over multiple coats. If a super smooth finish is desired this is a great way to get it without having to go over it again with finer grades of paper when working with paints or sealants over bare wood surfaces.
Sanding direction and pressure
Sanding direction is an important aspect to consider when using a palm sander. The initial sanding should be done in the direction of the wood grain, while later sanding can be done against the grain. Doing so ensures that scratches and swirls are kept to a minimum, resulting in an even finish.
When using a palm sander, it is important to use light pressure and to avoid overworking any one area of the surface. This helps keep it even and prevents gouging or damaging the surface. If you press too hard and go over one area multiple times, this will cause it to become visibly different from nearby areas which were worked less intensely with lighter pressure.
For very detailed finishes that require a lot of detail work and sanding time, consider switching from a palm sander to manual hand-sanding methods with finer grit papers for greater control over pressure applied.

Conclusion
When sanding furniture with a palm sander, the goal is to create an exceptionally smooth finish and remove any imperfections that may be present in the wood. Depending on the type of job you are doing and how fine a finish you wish to achieve, you may use several different types of sandpaper and may even need to move up through several grits of sandpaper over a number of hours.
In order for your piece of furniture to turn out perfect each time, it is important that you stay patient and take your time when doing any type of sanding job. Additionally, ensure that you read all instructions closely before beginning any project.
By following these steps and taking your time throughout the entire process, your hard work will pay off in the end when your beautiful piece of furniture is complete.
FAQ’S
What is the most efficient way to use palm sander?
Move the sander back and forth in the direction of the grain, applying even pressure.
Is a palm sander good for furniture?
Yes, palm sanders are great for furniture as they are lightweight and easy to handle, making them ideal for sanding large flat surfaces.
What are the best sanding techniques for furniture?
Sand with the grain of the wood and start with a coarse grit sandpaper before moving to finer grits. Sand in a circular motion for curved or detailed areas.
What is the fastest way to sand furniture?
Using a power sander, like a palm sander.
Do you push down on a palm sander?
No, you should let the weight of the sander do the work and avoid applying too much pressure.
Why does sandpaper keep coming off palm sander?
The sandpaper may not be properly attached to the sander pad, or the pad may be worn and need to be replaced.
Is it better to sand by hand or with sander?
Sanding with a sander is generally faster and more efficient, but sanding by hand may be necessary for detailed or hard-to-reach areas.
How much pressure do you apply to a palm sander?
You should apply light to moderate pressure and let the weight of the sander do the work.
What speed should I set my sander to?
This depends on the type of sander and the task at hand. Consult the manufacturer’s instructions for recommended speeds.
What size sandpaper do you use on a palm sander?
This depends on the size of the sander pad. Check the manufacturer’s instructions for recommended sandpaper size.
See more:
- Best benchtop sander 2023
- Best cabinet sander 2023
- Best detail sander 2023
- Best disc sander 2023
- Best drum sander 2023


