Looking for the perfect sander for your cabinetry project? You’re in luck! This article provides a complete guide to help you find the best sander for your needs.
From understanding types of sanders to knowing important features, this article covers it all – ensuring you find the perfect match for your job. So, are you ready to dive in and make an informed decision? Let’s get started!
When it comes to sanding woodworking projects, having the right sander is key. Sanding is an important part of any woodworking project, whether you are building furniture, refinishing cabinets, or just doing some DIY projects around the house. In order to get the best results and make sure that your project looks great when you are finished, having the proper sander for cabinetmaking is essential.
This guide will provide an overview of what to look for in a sander for cabinets and the different types that are available. After reading this guide, you will be better informed about sanders and more prepared to invest in one that will fit your needs.
Factors to Consider when Choosing a Sander for Cabinets
When picking a sander for cabinets, there are a few important factors to consider in order to ensure you make the best purchase. First of all, it’s important to determine the type of sander you need — whether it’s an orbital sander or a belt sander. Additionally, you should assess the type and amount of material that needs to be sanded.
The design of the sander is also essential for successful sanding. Is dust collection available? Are there features such as ergonomic handles or improved control? Other considerations include power, size, speed settings and noise level.
To ensure you are buying a quality product from a trusted manufacturer, do your research and read reviews from other customers who have purchased similar items. Purchasing from a reputable company will help ensure that any warranties are honored in case something goes wrong with your purchase.
Power source
When purchasing a sander, you will want to consider the power source. If you’re looking for one that is small and easy to move around and transport, then an electric corded model may be your best option. For convenience, portability and versatility in tight corners, battery-powered sanders are becoming more popular. They offer the advantage of allowing you to maneuver even in limited space. Many cordless models have brushless motors with variable speed control which provides greater accuracy as you work.
For large projects that require more power and speed and where long hours of continuous use are involved, an air-powered option is the best choice. These high-end tools come with accessories such as various pads which makes them suitable for a variety of jobs. You will also want to consider the wattage or horsepower needed if your project requires difficult or specialized sanding tasks like contouring or shaping details on wood pieces where a high amount of pressure is needed.
Motor power
The motor power of a sander is an important factor to consider when choosing the right one for your project. A higher-powered motor will give you more torque for better results, and it will also allow you to work faster. Look for sanders that have an output of at least 7-12 amps. This should be considered the minimum power rating for most woodworking tasks. If possible, look for sanders with more power than that, such as 13-15 amps.
The type and size of the motor will also determine how fast you can work, how heavy the machine is, and how much vibration it produces in your hands while you work.
Dust collection system
When sanding cabinets, you’ll find that the dust from your sandpaper can quickly accumulate. You need to consider how the sander you’re looking at accommodates dust collection. If a sander doesn’t have a built-in dust-collector or vacuum attachment, you should factor in the cost of purchasing a separate unit. The combination of dust and wood fragments will quickly become tedious if you don’t take several precautions to keep it at bay – both for cleanliness in your workspace as well as air quality throughout your house.
A good dust collection system will channel the debris away from the sanding surface; some have filters which trap particles and allow clean air to enter your cabinet shop or even home, while others have bags or containers attached near the work area which can be easily emptied with minimal mess. Generally speaking, a more expensive sander is likely to come equipped with better dust collection capabilities; however, some products also have vacuum attachments that can be bought separately. In order to ensure maximum safety and cleanliness while using a sander, it is important to select one with good dust collection capabilities so that it can efficiently remove debris from not only your work area but also from the general living environment it is being used in.
How to Use a Sander for Cabinets
Using a sander for cabinets is not difficult, but there are some steps you should follow to ensure a professional and efficient result. To begin, it is important to select the right type of sandpaper for your project. Sanding is done on bare wood with course sandpaper while fine-grit paper is used to finish the surface. Then, apply a light coat of lubricant to protect and reduce friction between the sander pad and the wood surface.
Next, set up your work station by placing a drop cloth or tarp over any areas that may be damaged by debris or unintentional spills. Put on protective gloves, eye protection and an appropriate dust mask before beginning the sanding process. It’s also important to use good posture while working in order to reduce fatigue and strain on the body from extended periods of use.
When operating your sander, it is important to remember to always move in one direction with long even strokes at a moderate rate over the wood surfaces where needed and avoid creating gouges because these will be harder to fix later. Be sure to frequently clean off any build-up of dust on both sides of the machine pad as well as removing particles from within any crevices so that they do not scratch or degrade the finish as you work. After majority of sanding is complete switch out course sandpaper for fine-grit paper and repeat process until desired results are reached. Finally remove all traces of debris from cabinet surfaces with shop vacuum before applying final finish coat.

Preparation
Before beginning the process of sanding a cabinet, there are several steps to consider in preparation. Select a sandpaper fine enough to achieve the desired result without causing damage to the wood surface. For example, a finer sandpaper should generally be used for an older piece of furniture, as the wood is more delicate.
Prepare the area by wiping away any debris or dust from the surface. Additionally, remove any hardware such as handles and hinges to prepare for efficient and comprehensive sanding. Use painter’s tape or masking tape around corners and edges where you would like to avoid over-sanding.
If electricity will be used, plug in your electric sander and allow it time to warm up before beginning. Lastly, ensure that you’re wearing protective eyewear and a respirator before you begin working with electric power tools.
Sanding technique
It is important to have a good technique when sanding cabinets with an electric sander. When using an orbital or random-orbit sander, start sanding parallel to the grain of the wood and at a 45-degree angle. This motion will help to remove any flaws while still following the grain line in the wood. Make sure that you keep the sander moving, as this will help prevent small scratches from appearing on the piece. If you hit a large flaw in the wood, adjust your downward pressure on the sander to ensure that you are properly removing it, but take care not to press too hard and scratch the surface of the wood.
For flat surfaces, make sure that each pass with your sander overlaps slightly on all sides so that you are targeting every area. To get into corners and divets in your cabinet door, use an edger or corner sander first to get into those tighter spaces before using a larger sheet or orbital sander. As you work through each section of your cabinet door, use gentle strokes around all edges and any accents carved into it, as these areas tend to be more delicate than others. Finish up by wiping away any dust created by sanding and lightly dry sand with fine grit paper for a beautiful finish!
Sandpaper grits to use
Choosing the right sandpaper grit for your project is an important step in getting a high-quality finish for your cabinets. Sandpaper grits come in a range of coarseness – the lower the number, the coarser the grit and the more material it will remove. For example, 40-grit sandpaper is much coarser than 120-grit paper. Generally speaking, you want to start with a coarse grit (40 to 80) to begin your project, then move on to finer grits (100-150) and even finer (180 and higher). Keep in mind that many power sanders won’t accept paper under 100-grit, so that should be factored into your selection process.
A common pattern to follow when power sanding kitchen cabinets is: 80-grit first to remove old coatings or paint; 100-grit second for further refinement; 150 third and finally 220 fourth. By following this approach you ensure that each layer of progress is properly smoothed down before applying another coat of stain or sealant. For hand/orbital sanding, 180 or 220 will give you great results as long as you take care not to scratch too aggressively on any one part of the cabinet surface.
Maintenance and Cleaning of Sanders for Cabinets
When it comes to sanders for cabinets, proper maintenance is key for peak performance and a longer life-span of the machine. Below are some tips and guidelines to ensure optimal usage:
- Clean the sander after each use – It is important to blow or vacuums off any sawdust or debris as soon as possible. This will help keep the inner parts free from dust particles that may accumulate and reduce the performance of your machine.
- Check for loose fasteners – The tip of a screwdriver or allen wrench should be used to check if any screws or bolts have become loose through usage. Tighten these as needed to prevent damage and unexpected hiccups while in use.
- Apply lubricants at regular intervals – Depending on how often you use your sander, it might require more frequent lubrication with a recommended lubricant spray or oil to keep them properly maintained and functioning at peak capacity with minimal friction caused by metal-on-metal contact between components.
- Change out the sanding sheet when required – If you find that your sander’s paper isn’t working correctly, it might be time to switch out the paper sheet with a new one that fits tightly over the base plate so that it sands everything evenly without any irregularities.
- Replace carbon brushes when necessary – Carbon brushes are small cylindrical components found inside our motor block which wear down over time due to being exposed to high temperatures during operation, causing them need replacing even with minimal use and cleaning/maintenance of your sander as needed depending on its specific manufacturer recommended intervals/instructions found in its manual guidebook so they don’t fail prematurely due excessive wear and tear during normal operations periods without replacements done beforehand in order prevent malfunctioning issues down the road when left unchecked longer than necessary before finally attending too.
Regular cleaning
Regular cleaning is an essential part of sanding, and to ensure the longevity of your sander, regular upkeep should be performed. Removing dust from the machine can help prevent buildup and prolong its life. It is especially important to regularly clean out the dust bag and filter to keep it running at peak performance.
Additionally, switching out sandpaper regularly will help keep surfaces free of gouges or bumps that could have been caused by worn abrasives. Finally, removing dirt and particles from any other moving parts will help ensure smooth operation as well as reduce wear on components.
Properly maintained sanders work better, last longer and are safer to use than neglected models.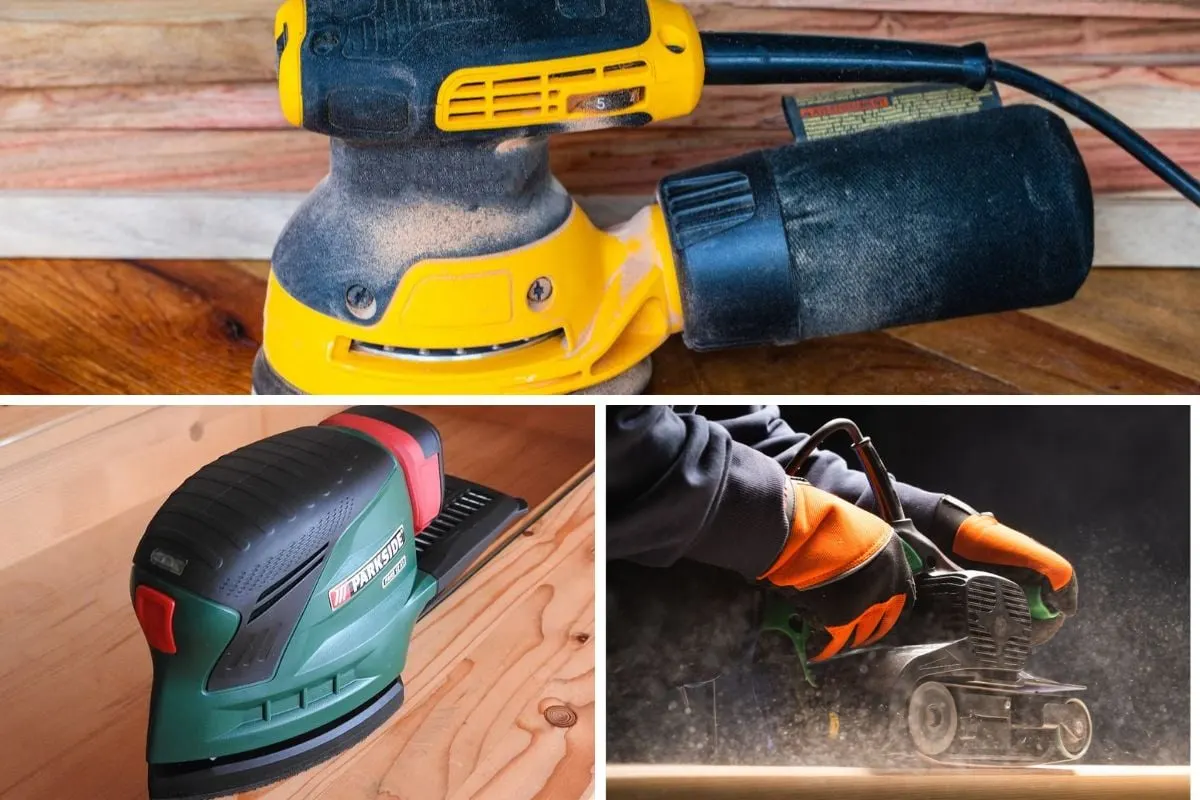
Lubrication
When sanding your cabinets, it is important to use the right lubrication. Different types of materials require different types of lubricants and solvents for smooth sanding. For wood, a mineral oil or silicone-based compound should be used. For various plastics and composites, a combination of mineral oil, PTFE (polytetrafluoroethylene) and wax is recommended.
When working on surfaces such as metals, plastics and composite materials, it is important to read the specific directions from the manufacturer’s product page before applying any specialty or chemical compounds to help ensure that you do not alter the surface in an undesirable way. Additionally, keep your work area well-ventilated and properly cooled with fans when using aerosol lubricants or solvents.
Replacement of worn out parts
Replacing worn out parts is essential to keep your sander in top working order. Most sanders will come with either an abrasive sheet or a sanding belt that you can easily replace when needed.
Depending on the type of wood you are using, you may need to use different paper or abrasive sheets for different finishes. If you’re squeamish about maintenance, look for a sander that comes equipped with accessories such as adjustable speed settings and dust collection bags so that you don’t have to do constant maintenance yourself.
Check the warranty on your machine — some manufacturers may require that you only use their specialty replacement parts to maintain the warranty and keep their machines running properly.
Conclusion
In conclusion, when shopping for a sander for cabinets there are several important points to consider. It is important to think about the size and weight of the machine, the type of sandpaper used, and the vibration of the machine – both in terms of overall noise created and comfortable feel on ones hands. Additionally, some machines come with extra features or streamlined designs that allow for faster work while still maintaining a precise finish. There are lots of options available so it is best to research as many sanders as possible before making any purchases.
With careful consideration and thorough research, you can find the perfect sander for your needs!
FAQ’S
What grade of sandpaper is best for cabinets?
The best grade of sandpaper for cabinets depends on the type of wood and the finish you are working with. Generally, a grit between 120 and 220 is recommended for sanding cabinets.
How do I know what sander to use?
The type of sander to use depends on the size of the project and the type of material being worked on. Belt sanders are good for large, flat surfaces, while orbital sanders are better for smaller, more detailed work.
What is the difference between orbital and sheet sander cabinets?
An orbital sander uses a circular motion to sand, while a sheet sander uses a back-and-forth motion. Orbital sanders are better for finishing and smoothing, while sheet sanders are better for removing material.
What is the best way to sand cabinets?
The best way to sand cabinets is to use a combination of sanders and grits, starting with a coarse grit and progressing to a finer grit. It’s important to work in the direction of the grain and to sand evenly.
What is 220 grit sandpaper used for?
220 grit sandpaper is used for finishing and smoothing surfaces, such as cabinets, before painting or staining.
When should I sand my cabinets?
Cabinets should be sanded before painting or staining, or if they are damaged or need to be refinished.
Can I sand cabinets with 80 grit sandpaper?
Yes, 80 grit sandpaper can be used to remove material from cabinets, but it should be followed up with a finer grit to achieve a smooth finish.
Can I use 320 grit sandpaper for cabinets?
Yes, 320 grit sandpaper can be used for finishing and smoothing cabinets, but it may not be necessary if a lower grit has already been used.
Is dry sanding better than wet sanding cabinets?
Dry sanding is generally preferred for cabinets, as wet sanding can cause the wood to swell and may result in a less smooth finish.
How do you sand cabinets smooth?
To sand cabinets smooth, start with a coarse grit sandpaper and work your way up to a finer grit, sanding evenly in the direction of the grain. Use a sanding block or sander for even pressure and to prevent uneven sanding.
See more:
- Best metal sander 2023
- Best orbital sander 2023
- Best oscillating sander 2023
- Best palm sander 2023
- Best random orbital sander 2023


