Are you tired of your woodworking projects looking unprofessional? It’s time to level up your skills with sanding! You can make any piece look polished, finished, and professional with the right sanding techniques.
Learn how to use this essential skill in woodworking by reading our ultimate guide.
Sanding is an essential part of all woodworking projects, from furniture to flooring, and it is important to understand the materials and techniques that are best suited for different types of sanding. From fine-grit sandpapers for creation of smooth finishes to harsher abrasives for removing paint and other coatings, there are many options available. The effectiveness of the sanding process depends on the type of wood, the desired outcome, and personal preference.
This guide aims to provide an overview of different kinds of sandpaper and appropriate uses so that successful results can be achieved with any woodworking project. Additionally, this guide provides specific instructions for properly preparing a surface before finishing as well as tips for achieving a flawless finish after staining or painting. Utilized correctly, sanding tools can make any project smoother, healthier and long-lasting.
Sanding tools and materials
Sanding is an important part of woodworking, and having the right tools and materials is essential. The type of sandpaper used will depend on the project, so it’s important to know what to use for each job. Most woodworkers will have an assortment of sandpapers available, ranging from very coarse to very fine grit. In addition, you may need to invest in specialty tools or materials such as finishing papers or pads for polishing purposes.
Below we’ll discuss some of the popular tools and materials needed when sanding:
-Sandpaper: Comes in a variety of grits that range from coarse (around 40-80) for removing material quickly all the way up to very fine (1500+). Grits should be chosen based on how much material needs to be removed as well as how smooth a finish you would like.
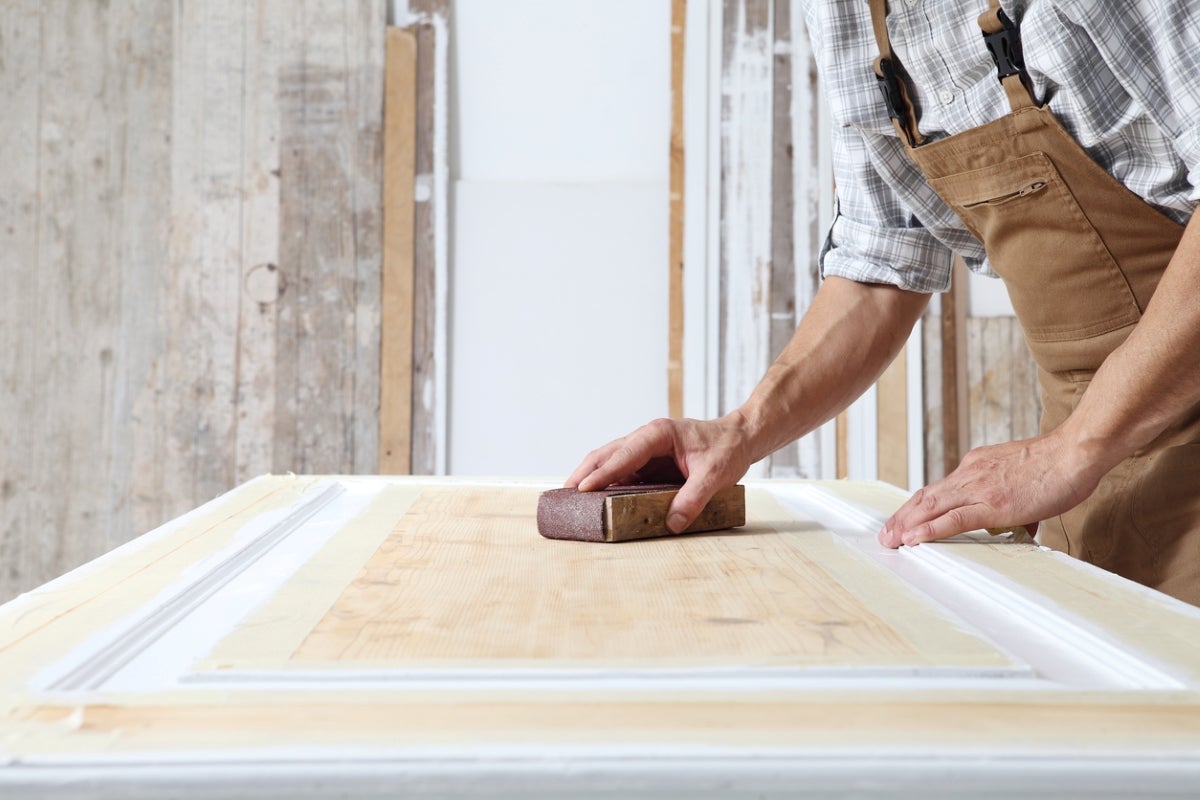
-Sanding Blocks: When working with small pieces or areas that require more control while sanding, a block can help keep your paper flat which improves results. Sanding blocks also help reduce physical strain by providing more area for your hands while controlling the paper.
-Power Sanders: A power sander is often used when working with large projects that require removal of a lot of material quickly. Options include orbital, belt and palm sanders; each has their own advantages and disadvantages so contact your local retailer for advice on which sander is best for your needs.
-Finishing Papers/Polishing Pads: Polishing pads are special abrasive sheets designed specifically to remove scratches in lacquer finishes or apply additional shine/luster without damaging underlying surfaces. Finishing papers come in ultrafine grits (1500+) and are best used by hand along with oil or wax – these types of abrasives create an ultra-smooth finish that cannot be achieved through power tool usage alone.
Sanding machines and their uses
Sanding machines and tools play an important role in any woodworking project. Sanding can be used to smooth surfaces and to shape them, resulting in a professional finish with improved strength and surface quality. There are a number of different sanders on the market today that are each designed for specific tasks. Generally, they will require some kind of abrasive material (paper, cloth, or diamond plates) that is moved across the surface while varying amounts of pressure is applied to the surface.
Belt sanders use belts coated with either sandpaper or abrasives and move it rapidly over a workpiece at right angles to remove material quickly. Belt sanders range from small handheld units for light work through to large stationary machines for heavy-duty industrial applications. Handheld oscillating spindle sanders are ideal for many small detailed projects requiring precision and versatility as they can be used at different angles and depths. Orbital sanders create random orbits using round sheets of sandpaper mounted in its base which provides an efficient way to smooth curved surfaces without leaving visible scratch patterns. For larger surfaces such as tabletops, electric disc sanders are available that have many options from large 7” discs through to portable 5” models ideal for very fine grade finishing work.
There is truly something on the market today for any kind of job you need done when it comes to sanding your woodworking project correctly. With all our technological advances today, there is no reason why anyone should make mistakes when trying to complete their project with a professional finish – make sure you pick the right tool or machine!
Sanding blocks and their uses
Sanding blocks are an essential part of woodworking, as they can be used to smooth surfaces, edges and corners. They provide a consistent finish and come in a variety of shapes, sizes and finishes to match your project’s needs. Whether it’s sanding down rough wood or refining the finish on a wood project, sanding blocks are a necessary component of any woodworking shop.
Sanding blocks also come in many varieties, such as metal or foam-backed blocks with abrasive surfaces or flexible surfaces like synthetic wool and rubber. Each surface has its own purpose; for instance, metal-backed blocks can be used to remove material quickly from the surface and create a flat, smooth finish when coupled with finer grade sandpaper. Foam-backed blocks are designed for finer finishing touches such as removing scratches and creating crisp lines when painting or varnishing furniture. Synthetic wool and rubber options work best for shaping curved items like spindles or rounding over edges on furniture pieces that need an extra degree of finesse.
No matter the type of sanding block you choose, it’s important to use safety equipment such as dust masks when using them to avoid inhaling fumes from the dust. Also be aware that excessive use can create a buildup of debris which must be removed regularly in order to keep your workspace safe and productive. By understanding your needs and following safety procedures, you can make sure you have the right tools at hand whenever you tackle a woodworking project.
Other tools used for sanding
In addition to sandpaper, there are other tools that can be used for sanding wood. Electric sanders are a popular choice as they make quick work of larger projects or projects that require more finesse than manual sanding could provide. These come in a variety of types, including random orbital sanders, belt Sanders, disc Sanders and finishing Sanders.
Random orbital sanders use circular-shaped oscillating pads to move in an irregular pattern over the surface of your workpiece. They are great for removing large amounts of material quickly and evenly, but may leave behind swirl patterns so it is important to keep the speed consistent when using this type of sander.
Belt Sanders utilize a belt made from paper or cloth which rotates continuously over the surface being worked on. These are great for removing large amounts of material quickly and evenly at a low cost, although it is important to ensure the belt remains taut for optimal performance.
Disc Sanders use rotating discs to remove material and come in both benchtop models and hand-held models; these are great for contouring and shaping wood as they can reach into tight spaces much better than other types of sander can.
Finishing Sanders use interchangeable foam pads that move in small circles quickly over the surface being sanded; these are great for final smoothing or fine removal of material where high precision is required.
Sanding Techniques
Sanding is an essential part of woodworking and it can be performed in several different ways. For the most part, it involves abrading the surface of the wood to remove any imperfections. Below are some of the different sanding techniques that can be used:
- Hand Sanding – this is done by hand using a range of grits from coarse to very fine. This type of sanding offers maximum control but it can also be time-consuming and labor-intensive.
- Orbital Sander – this electric tool runs in a circular pattern and is great for quickly removing large amounts of material or providing a smooth finish without leaving marks or scratches in the wood.
- Belt Sander – like an orbital sander, belt sanders use electricity to operate and come in stationary or handheld versions with different sizes of belts ranging from 12” to narrow 2” models. They offer a quicker way of removing stock than hand sanding but require more care to avoid accidental burn marks on the wood surface if used carelessly at high speeds or if left too long in one location on the wood stock.
- Random Orbit Sander – these sanders combine two types of motion, spinning and orbiting around its own axis, resulting in a cross-grain pattern which assists with flush sanded surfaces that transition into surrounding areas seamlessly while mitigating risk of leaving deep scratch marks on wood surfaces which other types may cause with more aggressive settings and movements because they are more controllable with slower speeds but also offer faster removal for jobs requiring even surfaces as well as efficient stock removal – making them ideal for both quick ‘n easy DIY projects as well as multi-day professional endeavors alike!
Hand sanding
Sanding is an important part of the woodworking process, and it can be done by either machine or by hand. Hand sanding requires more effort and patience than machine sanding, but it allows for greater control and precision. Whether you’re a beginner or a professional woodworker, it’s essential to know how to properly use a variety of hand sanding tools for best results.
Here’s everything you need to know about the different types of hand sanders, which grits are best and tips on how to effectively use them in your projects.
Types of Hand Sanding Tools: There are many different types of sanders that can be used for hand sanding, including detail sanders, foldable sanders, drum Sanders, random orbital Sanders and blocks. These tools all come with characteristic shapes that make them ideal for particular areas of the woodworking job.
Sandpaper Grits: Grits imply how rough or fine the paper is by their numbers; coarser paper will have lower numbers (30 -80) while finer paper will have higher numbers (250-400). The most commonly used are those in between -120-220- although if you plan to do detailed work with delicate finishes like French polishing then consider softer papers – 320-400.
Tips for Using Hand Sanders: Before starting your project make sure to select the right sander as earlier mentioned and then select the appropriate grit that fits your needs – also consider changing out your clogged or worn out abrasive sheets every now and then as they eventually lose their efficiency over time when used anyway other than cleanly. It is important not to press too hard when letting it run over material otherwise damage may occur, rather focus on making light steady sweeping motions consistently throughout each area being worked on so that no patches are left unfinished. Finally brushing off any sawdust between grit steps is necessary in order settle any scratches before moving onto more fine grit sheets so that perfection is met at every stage!
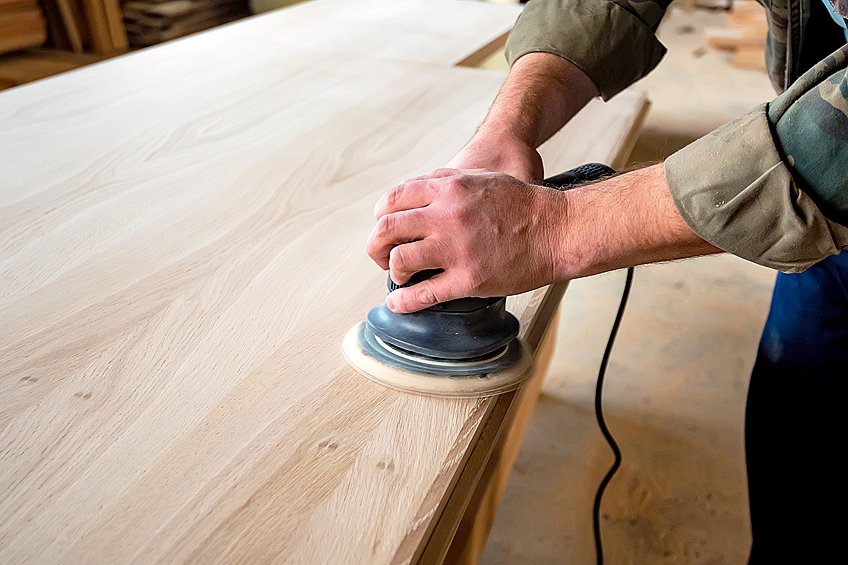
Power sanding
Power sanding is a fast and effective way to sand projects such as furniture, cabinets, doors, floors and other surfaces. Once the initial rough surface has been created with the use of coarse-grit abrasives, the finer details are added with power sanders. When choosing a sander for your project, it’s important to consider budget as well as application.
There are several types of power sanders on the market today which include:
- Random orbital sander: These tools move in an elliptical pattern allowing it to maintain even force during operation while eliminating visible swirls or scratches on finished project materials.
- Belt sander: These tools are best suited for shaping large pieces of wood like tabletops or cabinet doors. The action of a belt sander is much faster than what you receive with a random orbital or sheet sander allowing you to remove an abundance of material quickly and efficiently.
- Orbital sander: These sanders are light weight, have good vibration dampening qualities and conform well to curved surfaces making them perfect for rough and finish work on cabinetry or larger furniture pieces that require detailed shaping.
- Detail palm/mouse sander: Smaller than the other types of sanders mentioned above this lightweight tool is easy to maneuver for jobs such as tight corners or detailed edges and gets into spaces other larger tools can’t reach easily.
Sanding blocks are another type of hand held power tool used primarily for “sand finishing” flat surfaces like unleveled floors or stubborn paint adhesion. The pads attached come in medium (80/100) and fine (120/150) grit depending on the required usage and are made from either aluminum oxide or carbide powder paste materials so they will not glaze over in wet environments.
Choosing the right sandpaper grit
Choosing the right sandpaper grit is essential for desired results. Each type of sandpaper has a designated number designation representing the size and grade of each abrasive material. The most common grades are medium to fine, each giving unique sandy textures to the surface you are working on. The lower numbers (i.e., 40-80) mean the grains are larger and take away more material from your project, while higher numbers (i.e., 100-400) create a finer finish which is preferred for finer details.
Sandpaper also comes in various levels of grit attached to various backing materials such as paper, cloth, film or foam-backed sheets or rolls. The backing material is used to provide stability to the abrasive material when using it on wood surfaces, allowing for a more even surface finish without leaving gouges or depressions in your project. For example, heavier paper backings will last longer while fabric packages excel when hand-sanding contoured projects such as furniture legs or instrument bodies. Foam backing can be used when sanding intricate details like molding edges, while a film sheet will give you good control over larger areas of flat wood surfaces such as doors and tabletops.
When using sandpaper it is important to start with a grade that removes excess material quickly and then move through successive grades until you achieve the level of smoothness desired for your project before applying surface treatments like finish varnish or stain. Sanding with too fine a paper at first can cause excessive time spent perfecting one area instead of properly flowing throughout your piece evenly creating an overall refined look from top to bottom with no noticeable surprises along the way!
Preparation for Sanding
In preparation for sanding, it is important to first remove any excessive dirt and dust from the surface. Wooden pieces need to be completely free from any debris before you begin sanding them. A clean cloth soaked in soapy water can be used to wipe down the surface of the wood before use. If there are any gouges or uneven spots on the wood, these should also be made even and level with a chisel or plane tool prior to sanding.
Once all dirt and debris has been removed, it is best practice to attach some type of support or backing material behind the piece of wood that you are sanding. This backing material can come in many forms such as a thin piece of two-by-four (2×4) or a thick piece of foam padding, but ultimately should provide some level of cushion or buffer between the wood and your sanding block — this will help eliminate scratches due to an unsupported surface while you are sanding. Additionally, mask off areas where no sanding is desired by taping them off with painters’ tape — this will ensure that you don’t accidentally damage uncovered areas with too much grit from your sander.
Proper wood preparation before sanding
The first step in creating a finished product from wood is preparing the surface. Proper wood preparation before sanding ensures a professional-looking finish, and makes it much easier to get the results you’re looking for. Sanding can smooth out imperfections that have occurred in joinery or carpentry, and is an important part of any woodworking project. Without proper preparation, the finished product might not have the right look or feel.
Wood must be cleaned before sanding to remove dust and debris that could interfere with a smooth result. Once the surface is clean, any nails or screws should be removed if they are protruding above the surface of the wood, as these can cause major gouges when sanding begins. If there are deeper scratches or dents in the wood that need to be filled prior to sanding, using a putty knife or spackling compound will help make sure that no further damage is done when starting to sand.
The next step is to choose and install the appropriate grade of sandpaper for your project. Begin with a coarse-grit paper – typically between 40 and 60 -to remove most of material from the surface, then switch to fine-grit paper – 120-180 – for smoother results without altering angles created by planes or joinery shapes too drastically during this step. If primitive tools were used to shape joinery, hand tools such as chisels may be needed after sanding with very fine paper This allows you to refine edges while keeping proportions true on all interior angles while preserving details original in carpentry work.
Importance of cleaning the surface before sanding
The importance of cleaning the surface before sanding cannot be overstated. If dirt, dust, and other debris are allowed to collect on the surface of your project, not only can you damage it with the sanding belt or disc, but you may also end up breathing in a lot of airborne particles which can be harmful to your lungs. Even for a seasoned woodworker, it’s essential to clear away any debris from the wood before starting to work on it. Not doing so can result in an uneven finish or poor adhesion when applying finishes.
When cleaning the surface, make sure to use the appropriate tools and materials for the job at hand. Soft cloths are optimal for dusting off debris from intricate details like carvings and designs. You can then use a vacuum with a suitable nozzle attachment for getting rid of stubborn particles lodged deep within pores or such areas where no cloth could reach. Alternatively, using compressed air is another effective way to blow away dust and dirt particles quickly and efficiently without leaving any residue behind on your project’s surfaces.
Filling in gaps and cracks before sanding
When sanding wood, it is important to fill in any imperfections prior to sanding. Cracks, holes or gaps should be filled with either a commercial filler product or with a homemade solution such as sawdust mixed with wood glue. After the filler has dried, use fine-grit sandpaper to sand the repair smooth and level with the original surface.
For large projects, it’s often easier to skip this step and place a piece of veneer over the entire area instead — this is often seen in furniture construction. If using veneer, use water-resistant glue to ensure a securely adhered surface that stands up over time.
Conclusion
In conclusion, sanding is an essential part of woodworking. From preparing the wood for staining or painting, to smoothing rough edges and creating a perfectly flat surface – sanding can make all the difference in achieving excellent results.
Sandpaper grades vary depending on your project, but it’s important to select the right tool for the job. Low-grit paper focus on removing material quickly, while high-girt paper help refine and perfect.
Finally, consider using power tools such as a sanding block or belt sander if you have with larger surfaces to cover. By following these guidelines, you can ensure that all of your projects are prepared properly and that they look great when finished!
FAQ’S
Why is sanding important in woodworking?
Sanding is important in woodworking as it helps to smooth the surface of the wood, remove imperfections, and prepare it for finishing.
What is the importance of sanding?
The importance of sanding lies in achieving a smooth and even surface on the wood, which enhances the appearance of the finished product and ensures that the finish adheres properly.
Is it necessary to sand wood?
Yes, sanding wood is necessary to achieve a smooth surface and prepare it for finishing.
What is the purpose of sanding tools?
The purpose of sanding tools is to make the process of sanding more efficient and effective. They help to remove material quickly and evenly, and allow for greater control over the sanding process.
What are the basics of sanding wood?
The basics of sanding wood include selecting the right grit of sandpaper, sanding with the grain of the wood, using even pressure, and sanding progressively with finer grits of sandpaper.
What is the rule of sanding?
The rule of sanding is to start with a coarse grit sandpaper and gradually work your way up to finer grits, using light pressure and sanding with the grain of the wood.
What is the advantage of sanding by hand?
Sanding by hand allows for greater control over the sanding process, which is particularly useful when working on small or delicate projects.
What is the use of sandpaper in workshop?
The use of sandpaper in a workshop is to smooth and prepare surfaces for finishing, remove material, and shape objects.
What do you mean by sanding?
Sanding refers to the process of using an abrasive material, such as sandpaper or a sanding tool, to smooth, shape, or prepare a surface.
What is sanding very fine details?
Sanding very fine details refers to the process of using a very fine grit sandpaper or sanding tool to smooth and refine small or intricate details in a woodworking project.
See more:
- Best sander for furniture 2023
- Best sander for hardwood floors 2023
- Best sander for removing paint from wood 2023
- Best sander for wood 2023
- Best sander to refinish furniture 2023


